Categories
Dulces Easy essentials Fácil Imprescindibles Peruvian Recipes Sweets

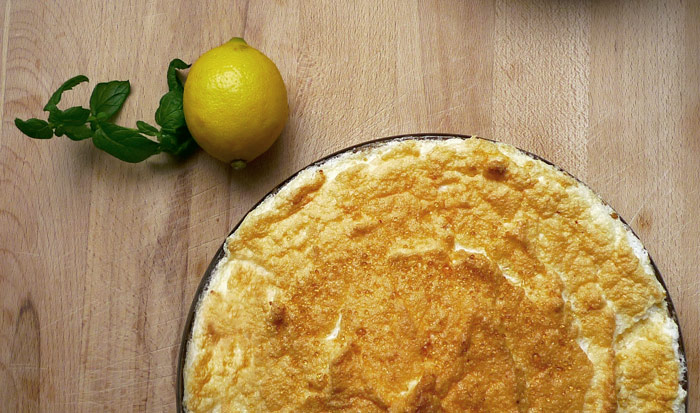
Pie de limón, el postre que conquista.

P1060658P1070594
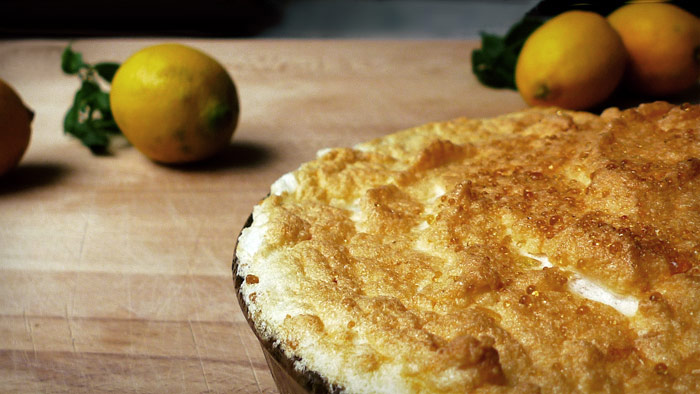
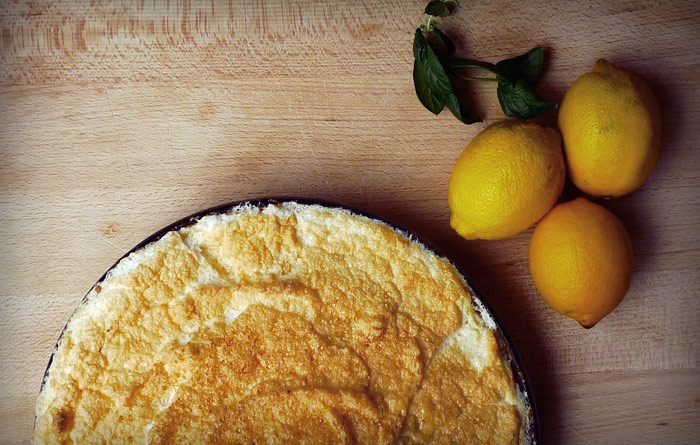
[tp lang=”es” only=”y”]Ésta fue la primera entrada de me kitchen. El primer post y el postre que me hizo pensar en que tenía que compartir esta receta con  los demás. El pie de limón es un postre clásico de la cultura anglosajona dónde se le conoce como Lemon meringue pie y lleva dando vueltas desde mediados del siglo XIX. Los Peruanos, no me pregunten cómo ni cuando nos lo hemos robado olímpicamente  y ahora es un postre clásico de la repostería peruana casera. Claro que en Perú no lo hacemos con limones (los amarillos) sino con limas (nuestros limones) con lo que realmente hacemos Key lime pie… pero terminologías aparte, no conozco a nadie a quién este postre no le deje enamorado. Es fácil, es rápido y es absolutamente delicioso. Eso sí tiene doscientasmil calorías… pero no es para comer a diario  y con lo bueno que está, se las perdonamos.  He decidido reeditar la receta básicamente por que se merecía un post más bonito.[/tp]

[tp lang=”es” only=”y”]Los ingleses tienen otra forma de hacerlo, la clásica, que lleva otro proceso de masa y de relleno. Esta no es la receta original  es la receta peruana en concreto la de mi casa y  aviso, esto es adictivo!

Hay algunas variaciones con la primera receta, vamos a ello.[/tp]

[tp not_in=”es”]This was the first entry in me kitchen. The first post and the dessert that made me think that I had to share this recipe with others. The lemon meringue pie is a classic dessert of Anglo-Saxon culture and carries around since the mid-nineteenth century. Peruvians (don´t ask me how or when) have stolen it and now it´s a classic homemade dessert in peruvian homes. Of course, in Peru we don´t do it with lemons (the yellow ones) but with limes (our lemons) so what we actually do would be Key lime pie… but apart from all those details, I don´t know anyone who does n´t love this pie. It´s easy, it´s fast and it´s absolutely delicious. It does have (I guess) too many calories… but we don´t eat this every day and besides it´s so good, that they are forgiven. I’ve decided to republish the recipe basically because it deserved a nicer post than the first one.[/tp]

[tp not_in=”es”]The English have another way to it, the classical, it involves another process in the dough and the filling since it´s custard. So this is not the original recipe, this is the Peruvian recipe and particularly my family´s recipe and take notice, this is addictive!

There are a few variations from the first recipe I published, so let’s do this.[/tp]

P1070595

[tp lang=”es” only=”y”] Ingredientes

  • Zumo de 4 limones 
  • 4 yemas
  • 6 claras
  • 1 lata leche condensada
  • 3/4 taza de azúcar blanca
  • 2 tazas de galletas maria trituradas
  • 1/2 taza de mantequilla

Masa
Triturar las galletas ( yo las meto en una bolsa  ziploc y les doy un poco con el martillo, así de rudimentario, pero podéis meterlas en una picadora por ejemplo o con la mano) colocar la galleta  triturada en un bowl y mezclar con la mantequilla hasta  formar una masa, he puesto 2 tazas de galleta por media de mantequilla pero las proporciones dependerán  del molde de pie que tengáis. Tiene que haber suficiente masa para cubrir el molde entero y la pared del mismo, pueden hacer un poco y si falta hacer más. Cubrir el molde y las paredes con una capa no muy gruesa pero que tape todo. Aplastando bien con los dedos para que se pegue.

Meter en el horno unos 10 minutos a 170ºC para que se seque. Lo sacamos y dejamos enfriar.

Relleno
Separar las claras de las yemas de 6 huevos. Echar en otro bowl 4 de las yemas, el zumo de 4 limones y la lata de leche condensada. Mezclar bien. tiene que quedar una crema uniforme. El huevo se cocerá con el zumo de limón.Es importante mezclarlo bien.

Merengue
Cogemos las claras de los 6 huevos y batimos a punto de nieve añadiendo  de a pocos el azúcar. Tienen que quedar bien batidas, para comprobar  sacar la batidora y deberían quedarse en la espátula de la misma sin caerse. Nunca he sido fan de las torres de merengue… prefiero el justo y necesario. Pero si queréis hacer esos merengues de catedral, usad más claras, unas 8 deberían bastar.

Montaje
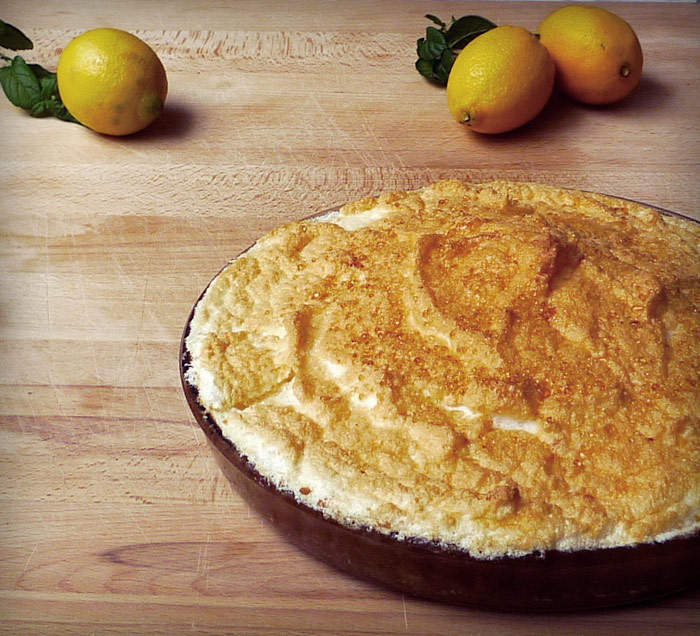
Colocar el relleno en la masa estirarlo bien para que cubra todo y por encima poner el merengue. Esto se puede hacer de muchas maneras, podemos ponernos creativos y con una manga pastelera hacerle formas o (como aquí) con una espátula de silicona haciendo una montañita, también podemos darle textura con un tenedor y dejarlo con formas y texturas distintas. Eso ya depende de vosotros, yo suelo terminar en la versión más simplificada de montaña rústica.

Cuando esté todo montado, le espolvoreamos un poquito de azúcar por encima (mínima) y lo metemos al horno unos minutos para dorar el merengue. Con eso hemos acabado, lo único malo de este postre es que no os durará ni un día![/tp]

[tp not_in=”es”]
Ingredients

  • Juice of 4 lemons
  • 4 egg yolks
  • 6 egg whites
  • 1 can condensed milk
  • 3/4 cup white sugar
  • 2 cups of crushed vanilla cookies
  • 1/2 cup butter

Dough
Crush the biscuits (I stuff them in a ziploc bag and give them a little with the hammer, so rudimentary I know but you can put them in a blender or do it by hand). Place the crushed biscuits in a bowl and mix with butter to form a dough, I have put 2 cups of cookies for half a cup of butter but the proportions will depend on the pie shell that you may have. There must be enough dough to cover the entire cast and the wall. Thereof, you can do this measures and make some more if necessary. Cover the pan and the walls with the dough. Crushing with your fingers to make it stick.
Place it in the oven for 10 minutes at 338 º F to get it dry. Take it out and let cool.
Filling
Separate the whites from the yolks of 6 eggs. Pour into another bowl 4 yolks and the juice of 4 lemons, add the can of condensed milk. Mix well until you have a uniform cream. The egg will get cooked with the juice. It´s important to mix well though.
Meringue
Take the whites of the 6 eggs and beat until stiff adding the sugar little by little. They must be well beaten, to check remove the blender and the meringue should stay in the same spatula without falling. I’ve never been a fan of meringue towers… I prefer it in a smaller amount. But if you want to make these sort of cathedral meringue, Make sure you use at least 8 whites.
Mounting
Place the filling on the dough and stretch it to cover well. Above all put the merengue. This can be done in many ways. You can get creative and with a pastry bag make forms or (as here) with a silicone spatula making a mound, you can also give it texture with a fork and leave it with different shapes and textures. That depends on you, I usually end up in the most simplified version of a rustic mountain.
When everything is mounted, sprinkle a little sugar on top (Minimum) and put it in the oven a few minutes to brown the meringue. So we are finished, the only bad thing about this dessert is that it won´t last a day![/tp]
P1070600P1070593

Categories
A bit more complicated Carnívoros essentials Imprescindibles Intermedio, un poco más de trabajo Italia Italy Meat

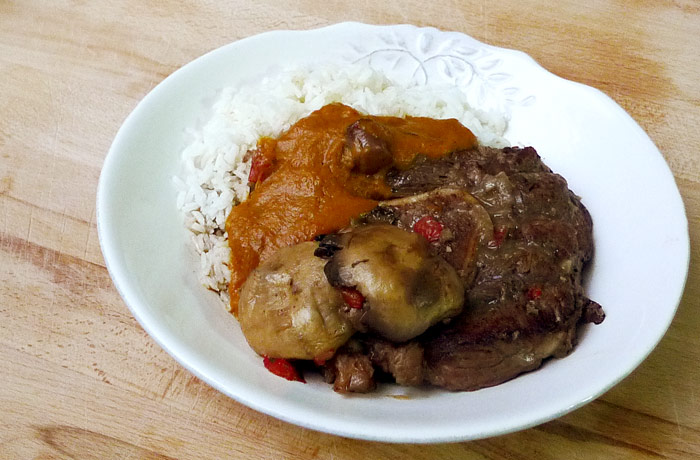
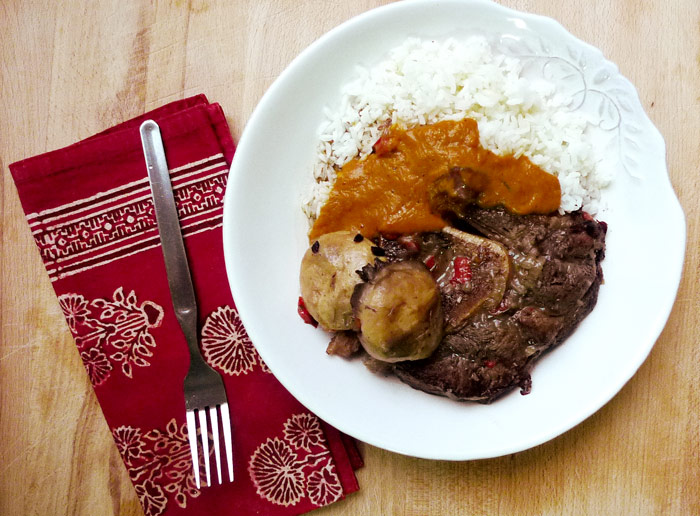
Ossobuco

P1070548P1070554

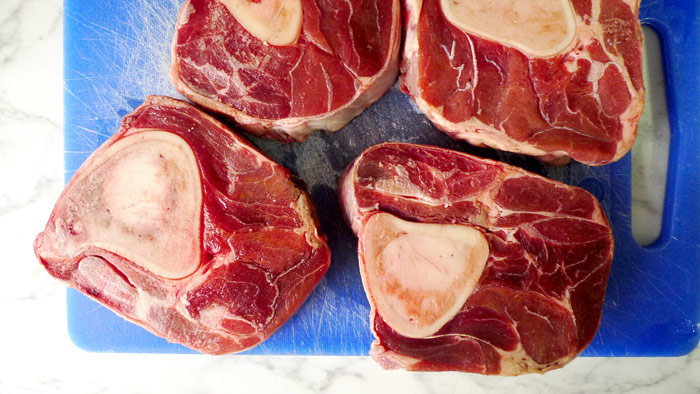
[tp lang=”es” only=”y”] Después de las (interminables) fiestas vuelve la calma, se acaban los días de descanso y hay que seguir con el ritmo habitual, así que estamos de vuelta. Lo bueno es que en estos pocos días libres he tenido tiempo de hacer varías cosas, por que hay que comer entre fiesta y fiesta. Así que una de las cosas que hubo en me kitchen fue este ossobuco. Ossobuco que significa literalmente hueso con hueco es un corte de carne típico de la cocina Italiana, Milanesa para ser exactos. No es un corte demasiado común en España pero se encuentra fácilmente y si no, tu carnicero te lo consigue. La pieza de carne en España se llama Jarrete y debe ser cortado grueso y con el hueso incluido. Dicho esto vamos con la receta. Esto es un plato muy casero, lentito y muy de invierno, aquí va.

Ingredientes

  • 4 cortes de ossobuco
  • 1 cebolla
  • 4 dientes de ajo
  • 4 zanahorias
  • 1 pimiento rojo
  • 8 champiñones grandes
  • 1 taza de vino tinto
  • 1 taza de caldo de ternera
  • sal
  • pimienta
  • aceite de oliva
  • vinagre balsámico

[/tp]

[tp not_in=”es”]After (these endless) holidays calm returns, I´ve run out of days off and have to keep pace with my routine, so we’re back. The good thing is I had time these days to do a lot of stuff! we need to eat between party and party. So one of the things that I did in my kitchen was this ossobuco. Ossobuco literally means bone with a hole. It is a cut of meat typical of Italian cuisine, Milanese to be exact. The piece of meat used is shank and must be cut including the bone, it should be thick about 3cm. That said let´s go with the recipe. This is a very homey dish, slow to cook and very winterly, here it goes.

Ingredients

  • 4 cuts ossobuco
  • 1 onion
  • 4 cloves of garlic
  • 4 carrots
  • 1 red pepper
  • 8 large mushrooms
  • 1 cup red wine
  • 1 cup of veal broth
  • salt
  • pepper
  • olive oil
  • balsamic vinegar[/tp]

P1070547

[tp lang=”es” only=”y”]Primero vamos a marinar la carne. Cogemos el ossobuco y lo pintamos con un poquito de vinagre balsámico y aceite de oliva virgen, les echamos sal y pimienta por ambos lados y los reservamos.

Picamos los ajos muy finitos, picamos la cebolla en rodajas finas y el pimiento en cubitos. Pelamos y picamos las zanahorias en rodajas. Los champiñones los limpiamos pero los dejamos enteros.

En una cacerola grande (yo lo hice en la cocotte) calentamos un chorrito de aceite a fuego alto. Cuando humeé sellamos las rodajas de carne por todos sus lados para que se doren bien. Las sacamos a un plato y las reservamos. Sólo sellar por fuera que ya se cocerán luego. Bajamos el fuego a medio y añadimos otro chorrito de aceite en la cacerola, sofreímos el ajo, el pimiento y la cebolla, cuando estén dorados añadimos el caldo y las zanahorias.

Volvemos a colocar la carne en la cacerola y añadimos el vaso de vino, la sal y la pimienta. Añadimos los champiñones encima de todo, tapamos y dejamos cocer a fuego lento. Tardará según la carne que tengamos más o menos 1 hora. Cada tanto ir revisando que no se queme el fondo y que no se evapore el liquido. Si vemos que se seca añadimos 1/2 taza más de caldo y 1/2 taza más de vino. Lo tenemos así hasta que veamos que la carne está bien cocida y blandita (debe separarse del hueso fácilmente) y las zanahorias están hechas.

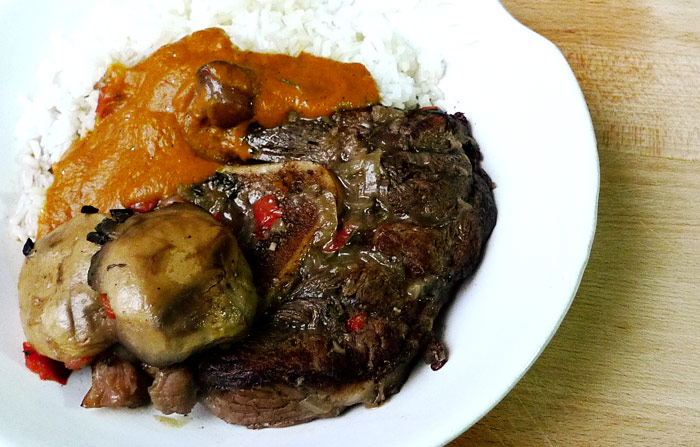
Cuando esté listo retiramos la carne. Cogemos aprox. la mitad del caldo y las verduras y lo licuamos para hacer una salsa espesa.Se suele comer con risotto, yo hice arroz blanco. Colocamos la carne junto al arroz, algunas verduritas enteras con su jugo y la salsa por encima… está de muerte, el guiso con el hueso y el sabor que le da es todo un acontecimiento![/tp]

[tp not_in=”es”]First lets marinate the meat. We take the ossobuco and paint it with a little balsamic vinegar and virgin olive oil, we toss salt and pepper on both sides and reserve it.

Chop the garlic very small, chop the onion into thin slices and the bell pepper diced. Peel and chop the carrots into slices. Clean the mushrooms but leave them whole.

In a large saucepan (I did it in the cast iron) heat a little olive oil at high temperature. When it steams seal the slices of meat on all it´s sides until golden brown. Then get them to a plate and reserve. Lower the heat to medium heat and add another drizzle of oil into the pan, fry garlic, pepper and onion. When they are golden, add the broth and carrots.

Put the meat into the pan and add the wine glass, the salt and the pepper. Add the mushrooms above all, cover and let it simmer at low heat. It takes more or less 1 hour. From time to time review the fund does not burn and the liquid does not evaporate. If you see that it dries add 1/2 more cup of broth and 1/2 more cup of wine. We have it like this until we see that the meat is well cooked and squishy (easily separated from the bone) and carrots are made.
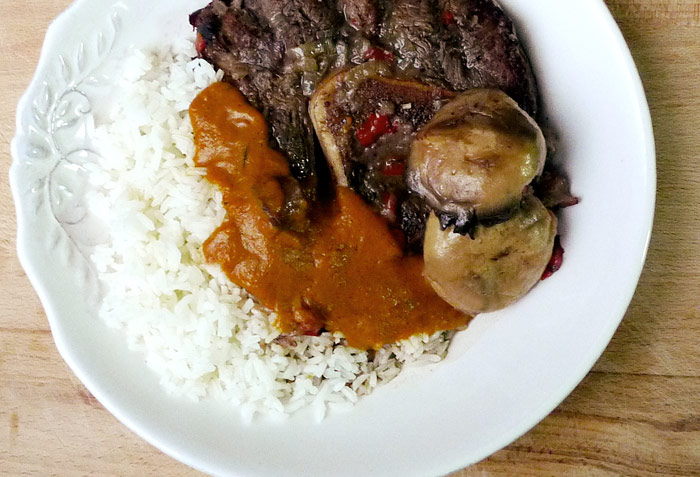
When ready retire the meat. Take approx. half of the broth and vegetables and liquefy to make a sauce. It is usually eaten with risotto, I made white rice. Put the meat next to rice, some of the vegetables with their juice and the sauce on top… It´s really good, the stew with the bone and flavor that it gives is a whole event![/tp]

P1070556
P1070557

Categories
Easy essentials Fácil Imprescindibles Vegetarian Vegetarianos

Primera receta del año! Crema de coliflor y patata

P1070502coliflor2

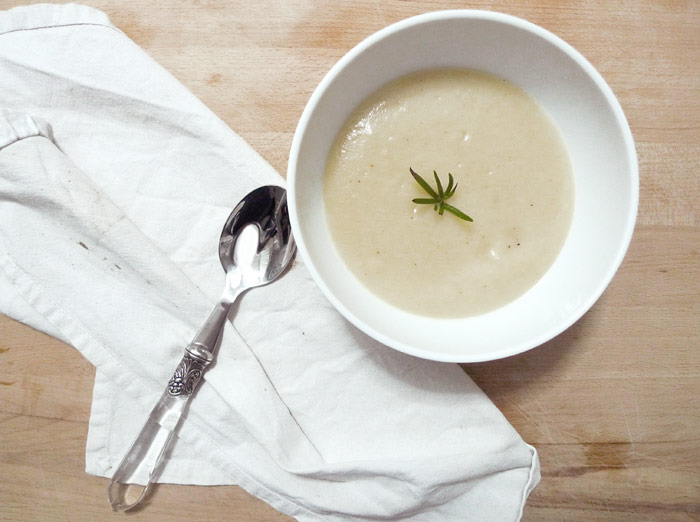
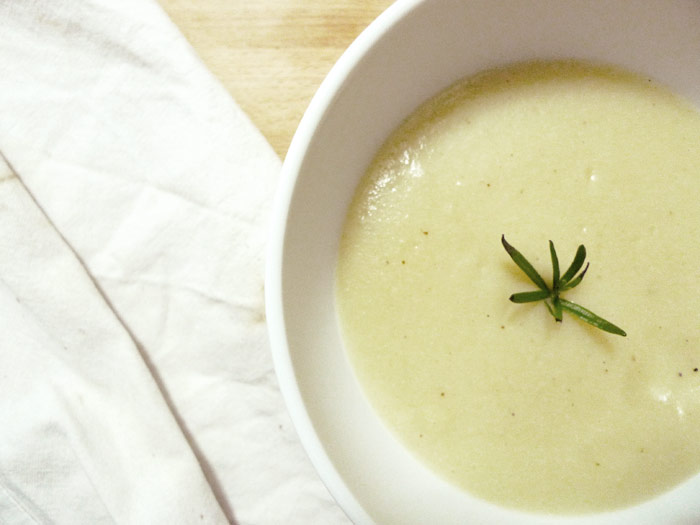
[tp lang=”es” only=”y”]Ante todo, feliz año nuevo! Vamos con la primera receta del año.Es una facilita y sobre todo de descanso. Descanso de comer y específicamente de comer tanta carne. No sé vosotros pero yo estoy ya un poco hartita de las comidas navideñas y con la cantidad de carne en todas sus formas que llevo ingiriendo en estos días,una necesita un día de vacaciones al menos. Así que hoy vegetarianos totales. Una crema de coliflor y patatas. Muy fácil, muy rápida y muy sanota.[/tp]

[tp not_in=”es”]Happy new year! Here is the first recipe of the year.Quite easy and perfect to take a break from all these holiday meat eating days. I don´t know about you but I’m a little tired of Christmas meals and the amount of meat in all of them is quite large. I need a meat vacation day so today we go completely vegetarian. A cream of cauliflower and potatoes. Very easy, very quick and very healthy.[/tp]

P1070506

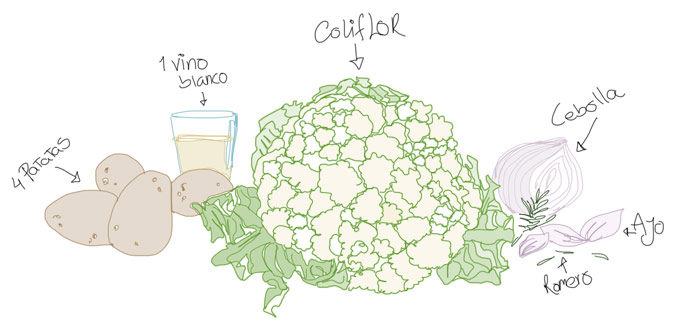
[tp lang=”es” only=”y”]Ingredientes

  • 4 patatas
  • 1 coliflor
  • 1 vaso de vino blanco
  • 1 vaso de leche
  • sal
  • pimienta
  • romero fresco
  • aceite de oliva
  • 4 dientes de ajo
  • 1 cebolla blanca
  • leche fresca

Primero vamos a poner a cocer por un lado la coliflor y por otro las patatas. Las patatas al agua con piel y todo y hasta que estén hechas. La coliflor, la cortamos sacando las flores y separandolas lo más posible y al agua también a cocer hasta que esté blandita. Cuando ambas cosas estén cocidas las sacamos del agua, las escurrimos bien y las reservamos.[/tp]

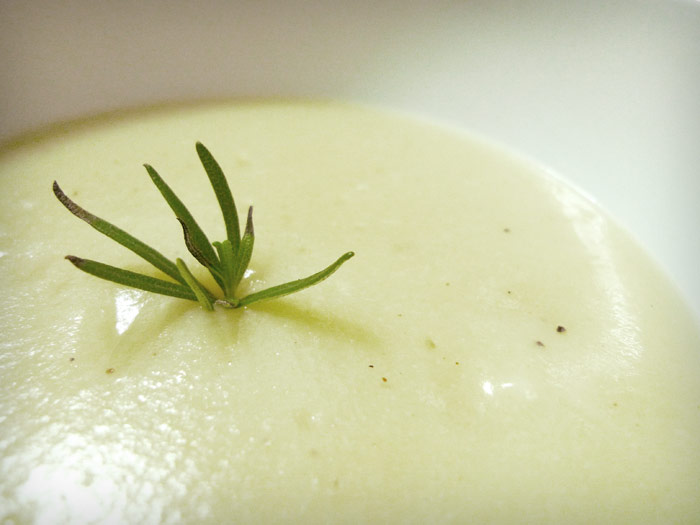
[tp lang=”es” only=”y”]En una cacerola grande sofreímos los ajos pelados pero enteros y la cebolla picada en trozos (grandes) luego añadimos la coliflor, las patatas peladas partidas en trozos, el vaso de vino y la leche, dejamos a fuego medio bajo un rato. Cuando la cebolla ya esté cocida y blanda (con la batidora de mano) licuamos hasta tener una crema. Si queda demasiado espesa añadir un poco de agua. Añadimos la sal y la pimienta y un chorrito de aceite de oliva virgen por encima. Ponemos un poco de romero fresco y lista![/tp]

[tp not_in=”es”]Ingredients

  • 4 potatoes
  • 1 cauliflower
  • 1 glass of white wine
  • 1 glass of milk
  • salt
  • pepper
  • fresh rosemary
  • olive oil
  • 4 cloves of garlic
  • 1 white onion
  • fresh milk

Let’s begin to cook the potatoes and the cauliflower. Potatoes go into a lot of water (skin and all), until they made. For the cauliflower remove the flowers and separate them as much as possible. Then toss them to boil in water until soft. When both are cooked drain well and reserve.[/tp]

[tp not_in=”es”]In a large saucepan with a bit of olive oil fry the whole peeled garlic and the onion coarsely chopped then add the cauliflower, the peeled potatoes cut into pieces, the glass of wine and the milk, leave over medium low heat for a while. When the onion is cooked and tender (with your hand mixer) liquefy until you have a cream. If it´s too thick add a little water! Add salt and pepper and a drizzle of olive oil over it. Put some fresh rosemary leaves and you´re ready![/tp]

P1070508

Categories
Dulces Easy Fácil Sweets Vegetarian Vegetarianos

Galette de manzana

P1070493P1070523

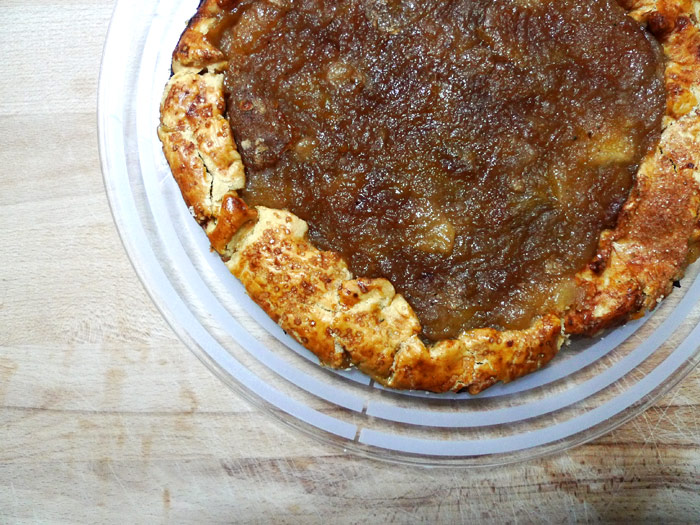
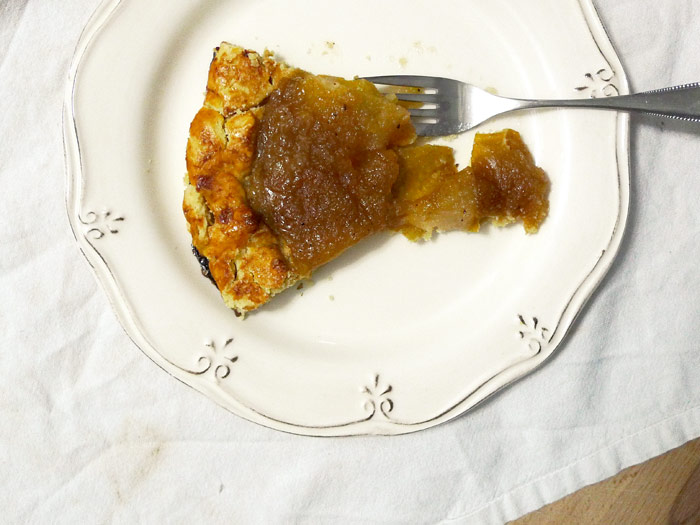
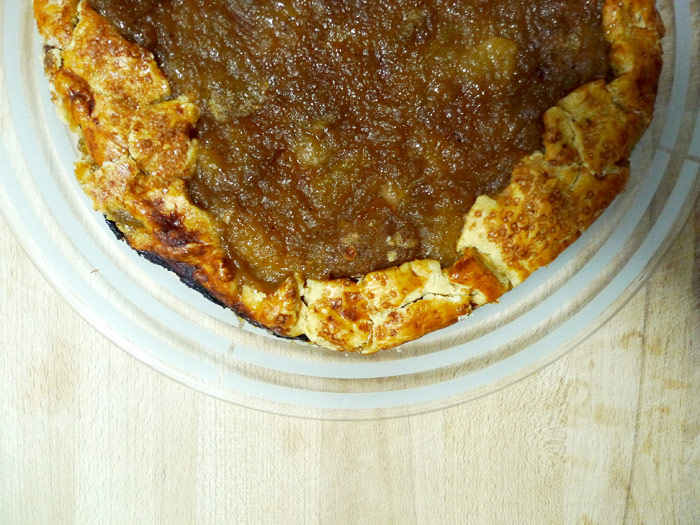
[tp lang=”es” only=”y”] Después de unos días sin cocinar por razones ajenas a mi voluntad, tenía ganas de algo rico, casero y dulce. Una galette de manzana. Un postre fácil, rápido y delicioso. No dura ni 24 horas en casa. De postre, de merienda y de desayuno,sí de desayuno es espectacular! Muy poco trabajo para un resultado tan bueno, es de esas cosas que hacen feliz cualquier día.[/tp]

[tp not_in=”es”]After a few days out of the kitchen for reasons beyond my control, I wanted something rich, sweet and homemade. An apple galette. An easy dessert, fast and delicious. It won´t last 24 hours at home. As a dessert, snack and breakfast, yeah! for breakfast it´s amazing. Very little work for such a good result, is one of those things that makes any day happier.[/tp]

P1070498

[tp lang=”es” only=”y”]Ingredientes
Masa

  • 1 taza de harina de trigo
  • 1/2 taza de mantequilla
  • 2 cucharadas soperas de agua
  • azúcar moreno

Relleno

  • 1 kilo de manzana reineta
  • 1 taza de azúcar moreno
  • canela en polvo
  • 1 pizca de sal
  • 2 clavos de olor triturados
  • nuez moscada
  • agua
  • ron
  • 1 huevo separado yema de la clara.
  • [/tp]

[tp not_in=”es”]Ingredients
Dough

  • 1 cup of wheat flour
  • 1/2 cup butter
  • 2 tablespoons water
  • brown sugar
  • Filling

  • 1 Kg. of pippin apples
  • 1 cup brown sugar
  • cinnamon
  • 1 pinch of salt
  • 2 crushed cloves
  • nutmeg
  • water
  • rum
  • 1 egg separated (yolks from whites)
  • [/tp]

    [tp lang=”es” only=”y”] La masa
    Mezclamos la taza de harina con la mantequilla cortada en cubitos y deshacemos la mantequilla con las manos hasta que tengamos algo parecido a unas migas, añadimos el agua y amasamos hasta tener una pasta elástica y homogénea. La hacemos una bola y la metemos a la nevera a esperar.[/tp]

    [tp not_in=”es”]
    Dough
    Mix the flour with the butter previously cut into cubes and mix with your hands until you have something like crumbs, add the water spoons and knead until smooth and elastic. Turn it into a ball and put into the fridge to rest.[/tp]

    P1070480P1070478

    [tp lang=”es” only=”y”] El relleno
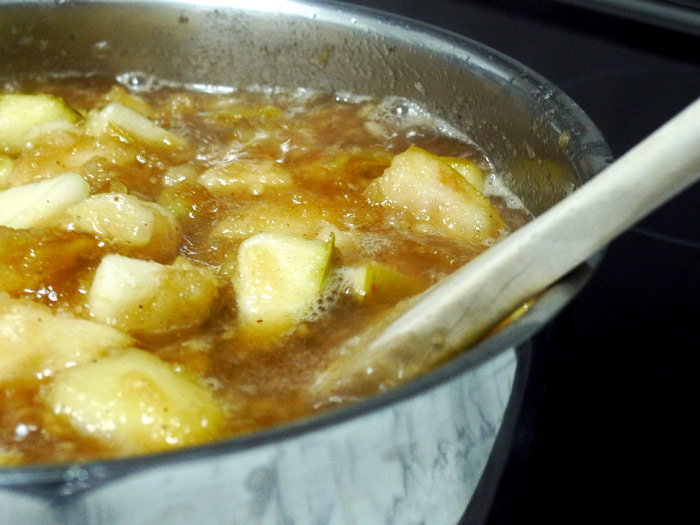
    Picamos las manzanas en cubitos. Las ponemos en una olla con un poco de agua aprox.1 taza. Añadimos el azúcar, una pizca de canela, el clavo, la nuez moscada, la sal y un chorrito de ron. Dejamos a fuego lento hasta que la manzana esté deshecha y tengamos una compota pero con algunos trocitos. Dejamos que se enfríe.

    Montaje
    Sacamos la masa de la nevera y la extendemos sobre un papel de horno con el rodillo en forma circular. No dejarla demasiado fina ya que tiene que aguantar el relleno. La pintamos con un pincel con la yema del huevo. Colocamos el relleno en el centro de nuestra masa dejando un borde ancho alrededor (no llevarla hasta el final, no es una pizza!) Cuando lo tengamos hecho simplemente doblamos los bordes de la masa por encima del borde del relleno. Hará como un contenedor como una “cuna” para el relleno. Pintamos la parte de fuera con la clara del huevo y espolvoreamos un poco de azúcar morena sobre la masa para decorar.

    Llevamos al horno a 180ºc unos 35 minutos en cuanto veamos que la masa está doradita y crujiente, fuera. Esta tarta se come tibia y si podemos con una bolita de helado de vainilla!

    *Un tip! Como os sobrara relleno, a mi me sobró. Licuadlo y así tendréis un puré de manzana que se puede almacenar en tarros de cristal durante unas semanas![/tp]

    [tp not_in=”es”]The filling
    Chop the apples into cubes. Put them in a pot with a little water aprox. 1 cup. Add the sugar, a pinch of cinnamon, cloves well crushed, nutmeg, salt and a dash of rum. Leave to simmer until the apples are soft and it looks like a compote but with some chunks. Let it cool.

    Mounting
    Take the dough from the refrigerator and roll it out on a baking paper in a circular shape. Do not let it go too thin since it has to put up with the filling. Then using a brush paint the dough with egg yolk. Place the filling in the center of our dough, leaving a wide border around (don not go all the way, it is not a pizza!) When it done simply bend the edges of the dough over the edge of the filling. It will act as a container or a “cradle” for filling. Paint the outside with the egg white and sprinkle some brown sugar over the dough to decorate.

    Bake at about 356 ° F 35 minutes and watch that the dough is golden brown and crispy and take out. This pie is best eaten warm and with some vanilla ice cream!

    *A tip! since you will have exceeding filling you can liquify it and store it in some glass jars for a homey apple sauce![/tp]

    P1070517

    Categories
    Uncategorized

    Top 5 de 2013 en Mekitchen!

    Sin-título-1[tp lang=”es” only=”y”]Ante todo, ¡Feliz Navidad! que luego me olvido. Este año no me ha tocado hacer cena así que he estado un poco alejada de las recetas de navideñas y sin darme cuenta ya pasó y en cuatro días más se nos acabó el 2013. Este año ha sido un suspiro, literalmente. No sé en que momento se ha pasado todo entre el 01 del 2013 y hoy. Así que nos toca mirar un poquito hacía atrás y al menos en cuanto al blog han habido muchos cambios y mejoras! esta es la recopilación de las recetas más vistas del blog durante el año “suspiro”, o sea las favoritas![/tp]

    [tp not_in=”es”] Primarily, Merry Christmas! This year I’ve been a bit away from Christmas recipes without realizing now it´s over and in four days we will be all over 2013. This year has been a breeze, literally. I don´ t know what has happened between 01 of 2013 and today! So now we have to look a little backwards and at least for the blog there has been many changes and improvements! This is the collection of our most viewed recipes of the year, that means your favorites![/tp]

    22

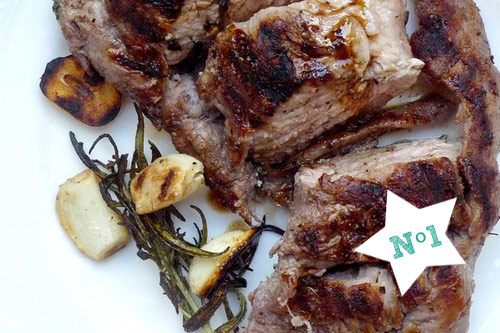
    tumblr_inline_mv0jyyK1AV1qbr8d2[tp lang=”es” only=”y”] La nº 1 La favoritisima: Carnívoramente: Solomillo a la plancha nada que nos gusta la carne sí o sí! que le vamos a hacer… [/tp]
    [tp not_in=”es”]Nº 1 The Favorite: Carnivorously: Grilled sirloin. Yes, we like meat![/tp]

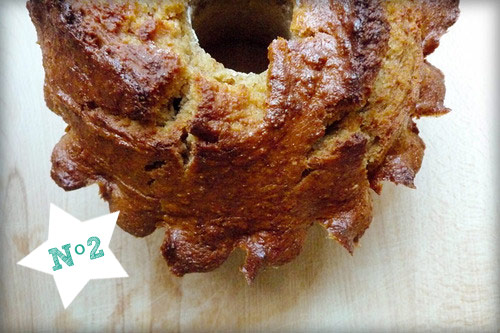
    tumblr_inline_mvdho6QEJw1qbrd2[tp lang=”es” only=”y”]La Nº 2 El gusto de comer algo rico pero sano: Bizcocho de plátano el dulcecito también nos gusta…[/tp]

    [tp not_in=”es”]Nº 2 The pleasure of eating something delicious but healthy: Banana cake, we also like the sweetness…[/tp]

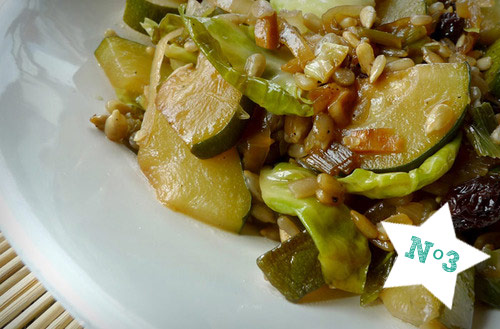
    tumblr_inline_mtzyt4xluV1qr8d2[tp lang=”es” only=”y”] Nº 3 La sorpresa: El reto de las coles de Bruselas Esta sí que me sorprende… de verdad me dejáis a cuadros y me alegro![/tp]

    [tp not_in=”es”]Nº 3 The surprise: The challenge of Brussels sprouts. This one does surprise me… really![/tp]

    4[tp lang=”es” only=”y”] La Nº4 Un clásico: Puré de manzana Un clásico y encima facilísimo , totalmente comprensible…[/tp]

    [tp lang=”es” only=”y”]Y por último![/tp]

    [tp not_in=”es”]No. 4 A classic: Applesauce. Classic and very easy, completely understandable…
    And last but not least![/tp]

    5[tp lang=”es” only=”y”]La Nº5 En la variedad está el gusto: Un quiché poco habitual por que salirse un poquito de lo establecido, mola!

    Pues estas son las 5 favoritas de 2013, yo diría que una buena recopilación, un poquito de todo, carnívoro, vegetariano, dulce, fácil… me gusta! Con ellas me despido de este año y os deseo feliz año nuevo y que 2014 sea un poco más lento… para disfrutarlo más![/tp]

    [tp not_in=”es”]No. 5 Variety is the spice! An unusual quiche to break some classics is goood!
    Well these are the Top 5 favorite recipes in Me kitchen for 2013. I’d say a good collection, a bit of everything, carnivorous, vegetarian, sweet, easy… I like it! With them I say goodbye to this year and I wish you happy new year and let 2014 be a little slower… to allow us to enjoy more![/tp]

    Categories
    Carnívoros Easy essentials Fácil Meat

    Picantones asados

    P1070435P1070442

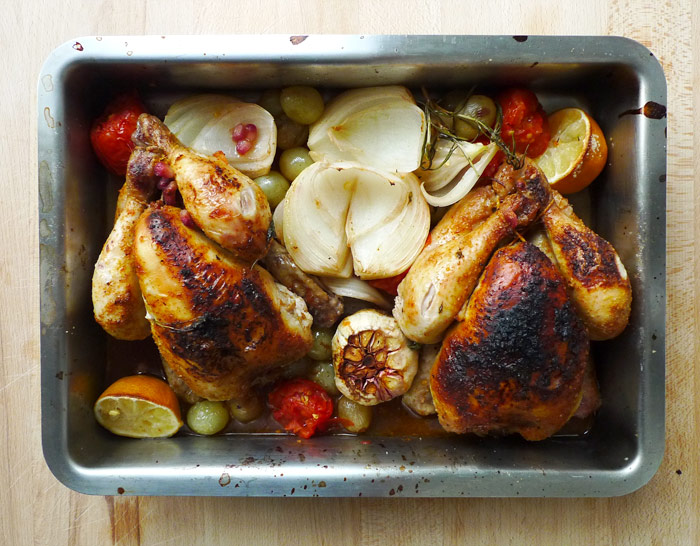
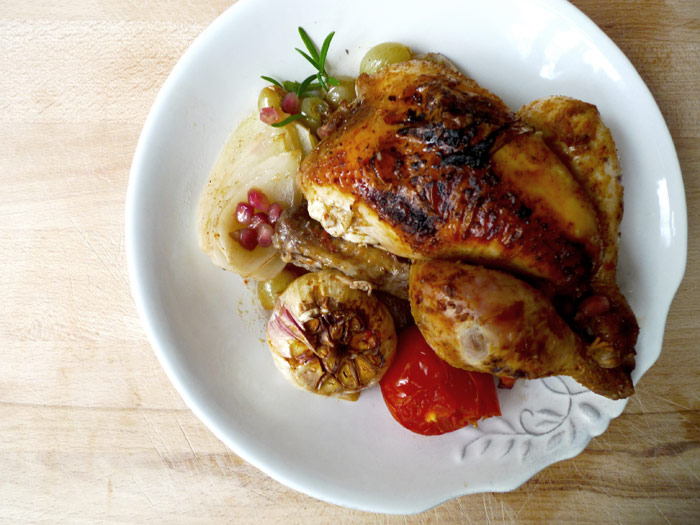
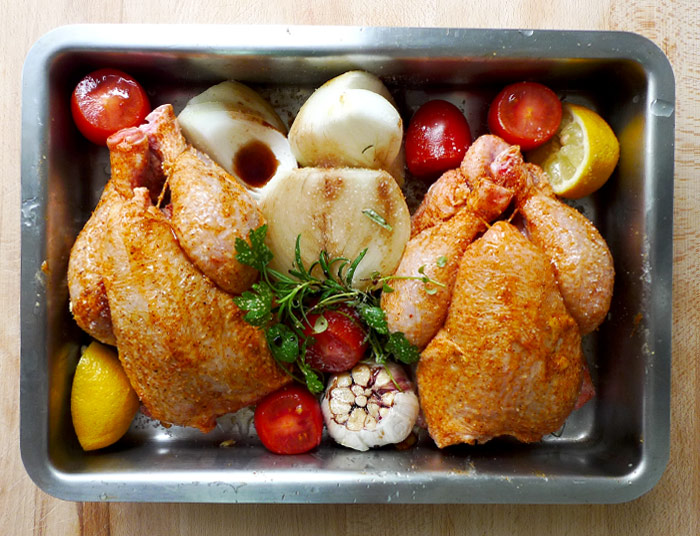
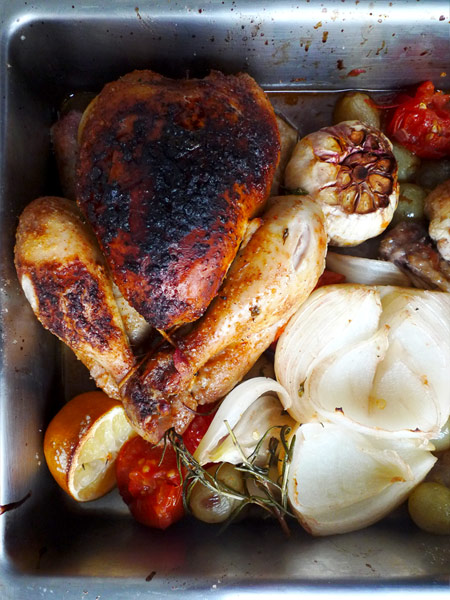
    [tp lang=”es” only=”y”] El sábado hice picantones. Nunca los había probado así que decidí aventurarme con estos mini pollos, en estas fechas hay de pronto una variedad enorme de pájaros por los mercados y estaba entre un picantón y un coquelet sin entender bien la diferencia entre ambos. En realidad el picantón es un pollo que se sacrifica con un mes de edad y 500g de peso mientras que el coquelet o tomatero se sacrifica con un peso de 500-1000 g pero son todos pollos básicamente. Así que en conclusión es un mini pollo, muy tierno y unipersonal. Aquí va la receta.

    Ingredientes

    • 2 pollos picantón
    • sal
    • pimienta
    • pimentón
    • mantequilla
    • vino blanco
    • limón
    • 1 cebolla
    • romero, perejil y tomillo fresco
    • sirope de agave
    • tomates cherry de pera
    • una cabeza de ajos
    • un puñado de uvas
    • un puñado de granadas

    P1070431
    Enmantequillamos los pollos, los embadurnamos bien de mantequilla, sal, pimienta y pimentón por todo sus lados y bien masajeados. Cortamos las puntas de la cabeza de ajos, pelamos la cebolla y la partimos en dos. Le cortamos la cabeza a los tomates cherry y partimos el limón. Colocamos en la bandeja de horno, los pollos, la cebolla, el ajo y los tomatitos. Colocamos las hierbas . Exprimimos un poco del zumo de limón sobre los pollos y colocamos las rodajas en la bandeja. Añadimos un chorro de vino blanco y un chorrito de sirope de agave, añadimos las uvas y la granada y al horno una hora aprox. a 170ºC. Ir verificando que el pollo esté bien hecho y doradito por fuera. Aprovechamos de meter en el horno unas patatas envueltas en papel albal para tenerlas asadas y listo! [/tp]

    [tp not_in=”es”]On Saturday I made poussin. I had never tried it so I decided to venture with these mini chickens. At this time of the year there is suddenly a huge variety of birds available at markets and I was between a poussin and coquelet without quite understanding the difference between them. Actually the poussin is a chicken that is sacrificed at one month of age and 500grs of weight while the coquelet is done weighting 500-1000grs, but both are basically chickens. So in conclusion it is a mini chicken, very tender and individual.Here goes the recipe.

    Ingredients

    • 2 chickens picanton
    • salt
    • pepper
    • cayenne
    • butter
    • white wine
    • lemon
    • 1 onion
    • rosemary, parsley and fresh thyme
    • agave syrup
    • cherry tomatoes pear shaped
    • A head of garlic
    • a handful of grapes
    • a handful of grenades

    Butter the chickens all round, with the salt, pepper and cayenne and give them a massage. Cut the ends of the garlic head, peel and slice in half the onion. Cut the head of the cherry tomatoes and slice the lemon. We put on the oven tray, the chickens, the onion, the garlic and the tomatoes. Throw in the herbs . Squeeze a little lemon juice over the chicken and place the slices on the tray. Add a little white wine and a splash of agave syrup, add a handful of grapes and grenades and bake for approximately one hour. at 338 º F. Verify that the chicken is well done and browned on the outside. Put some potatoes in the oven wrapped in foil to roast and you are ready![/tp]

    P1070436

    Categories
    Masas y Pan

    Exploraciones panaderas: Siguiendo instrucciones

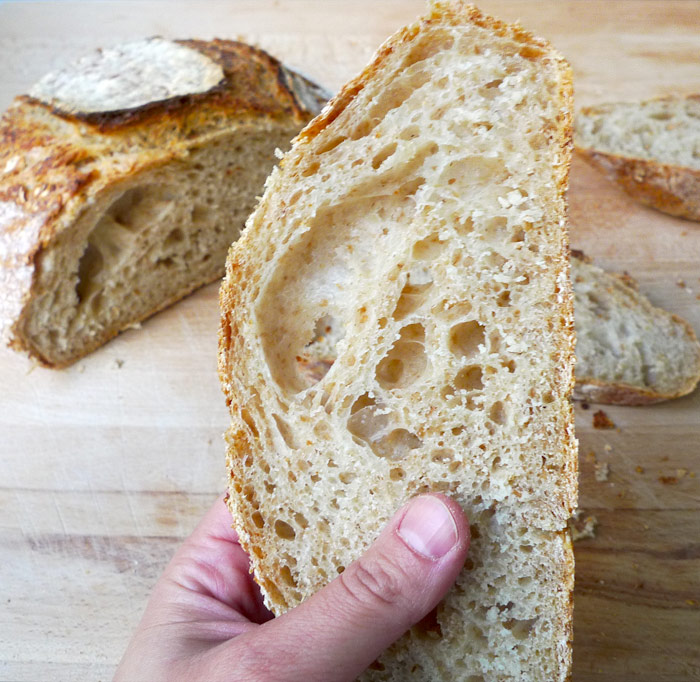
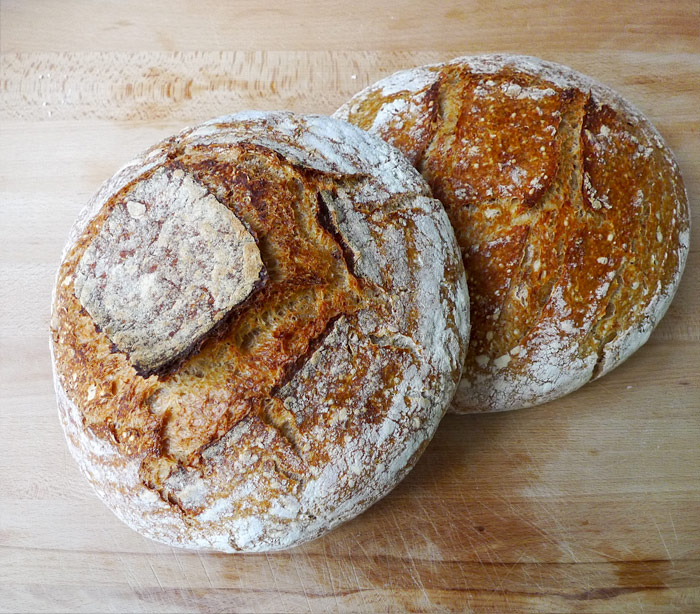
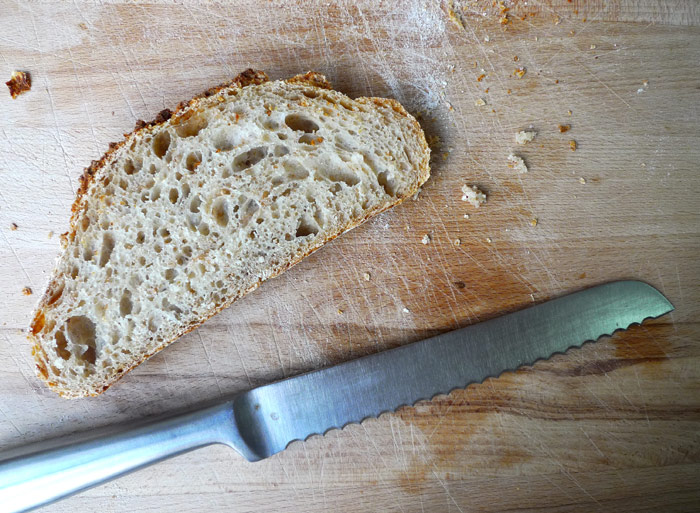
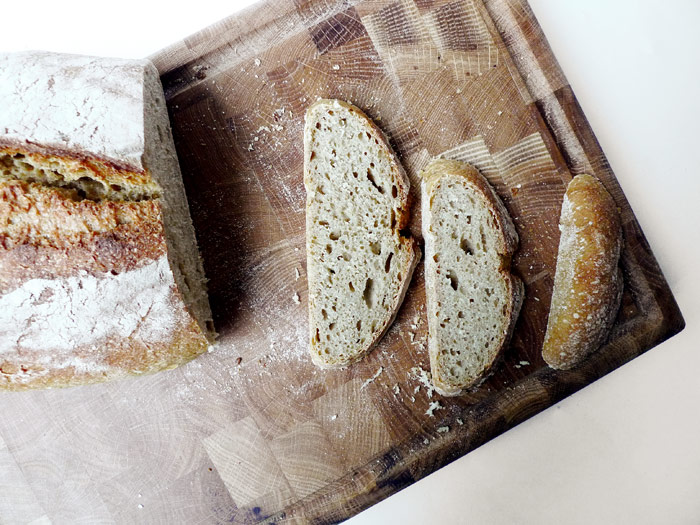
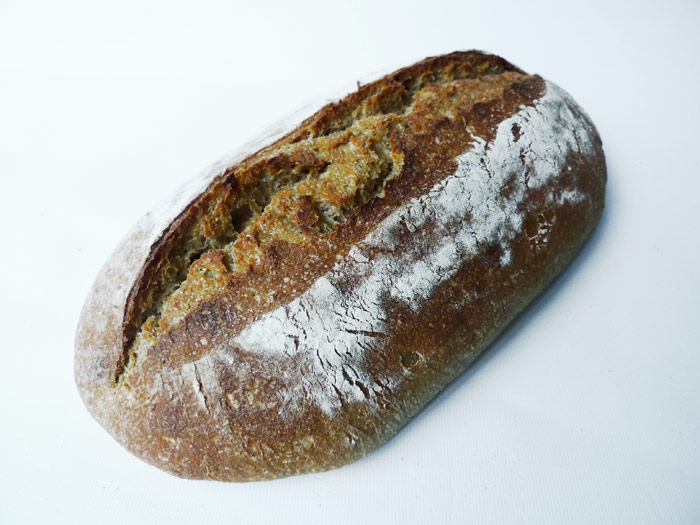
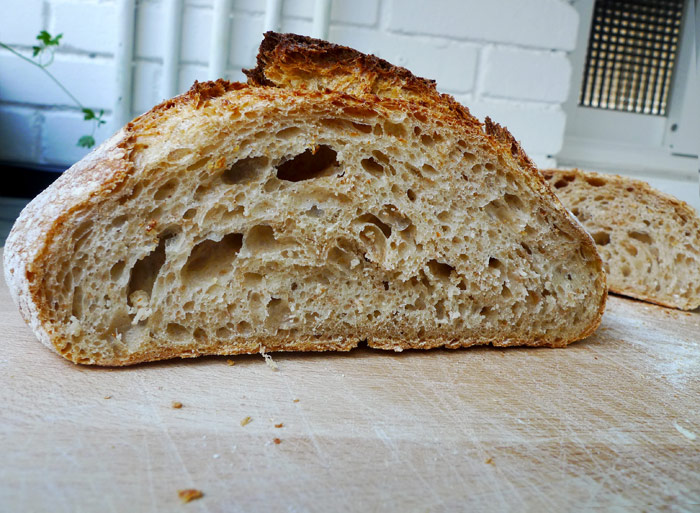
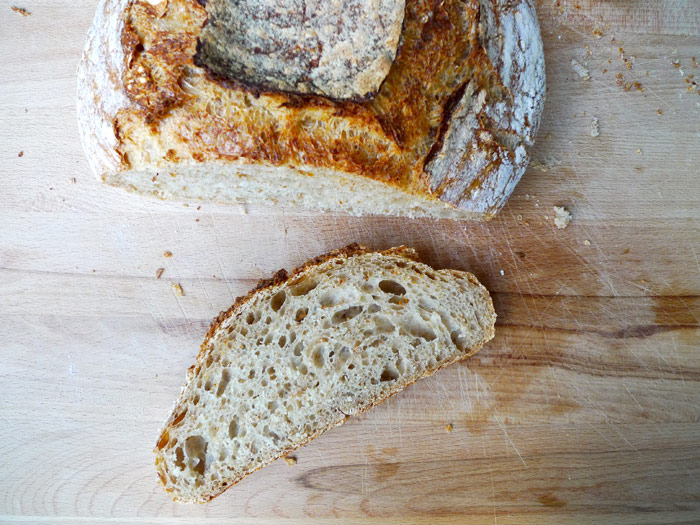
    P1070385El fin de semana decidí ser aplicada y seguir al pie de la letra la receta del pan de tartine. He de confesar que la mayoría de las veces tengo toda la buena intención de seguir las instrucciones y al poco me doy cuenta que he cerrado el libro y estoy haciendo cualquier otra cosa que se me haya ocurrido, esto es así. Pero bueno, esta vez decidí ser consecuente y el resultado me ha dejado muy contenta, me gustan mucho mis experimentos pero he de reconocer que está muy bien seguir las instrucciones de vez en cuando. Un pan de trigo blanco, horneado en la cocotte, sólo con masa madre de centeno y que me tiene más que contenta. Aquí os dejo las fotos.
    P1070394P1070396P1070398P1070390

    Categories
    Dulces Fácil Masas y Pan

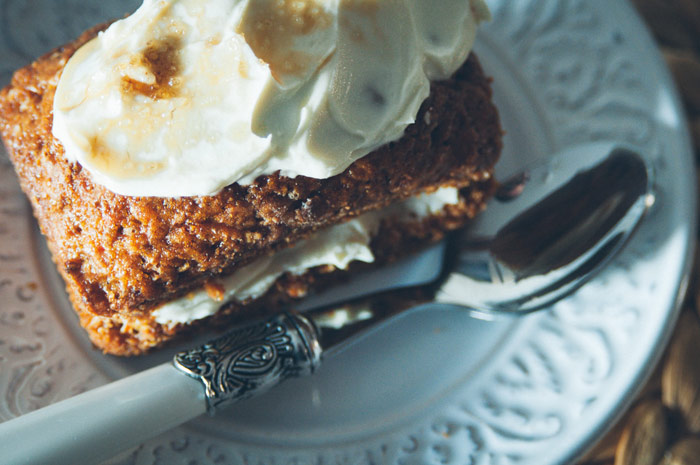
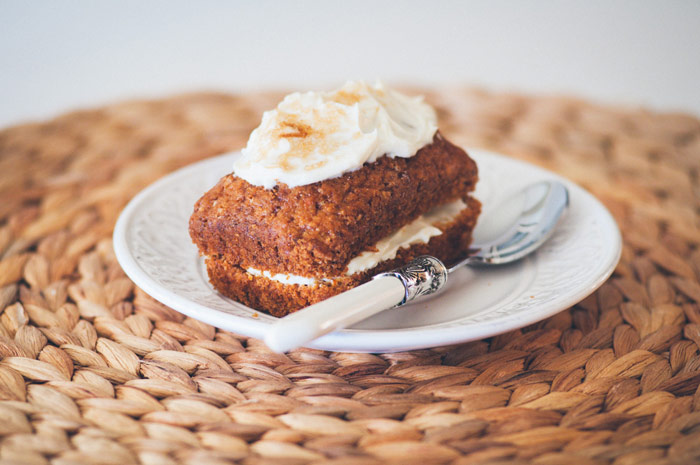
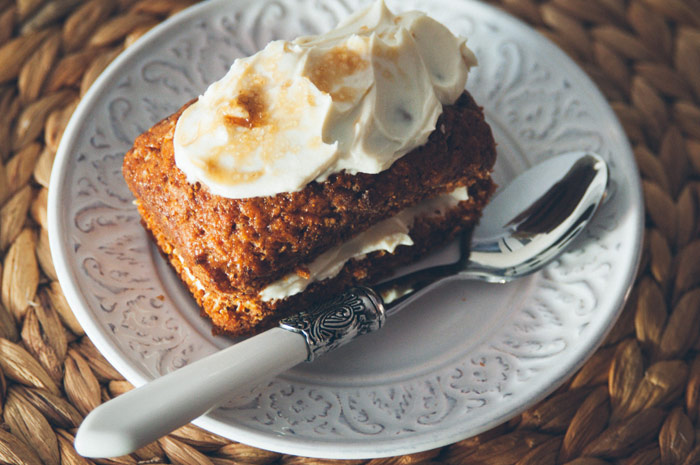
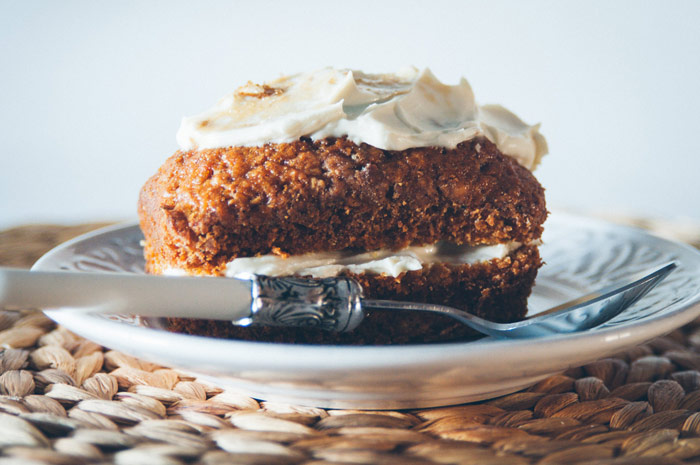
    Ceci n’est pas une carrot cake

    carrot_cake_13364_Mariano_Regidorcarrot_cake_13370_Mariano_Regidor

    [tp lang=”es” only=”y”]El otro día me preguntaron si se podía hacer mi receta de bizcocho con zanahoria, la verdad es que no lo había probado así que no lo tenía claro pero a partir de allí decidí investigar y la respuesta es que sí. Este no es un carrot cake como tal pero se le parece mucho, podríamos llamarlo carrot cake de palo y es que el carrot cake me encanta pero uff… mantequilla a tope, azúcar a más no poder y esta chica tiene el colesterol bastante alto de por si. Así que esta es una versión para comer sin remordimientos.
    Ingredientes

    • 1 taza de harina repostera
    • 3/4 taza de harina integral
    • 2 cucharadas té de polvo de hornear
    • 1 cucharada té de bicarbonato
    • 1 taza de azúcar de caña
    • 1 chorrito de esencia de vainilla
    • 2 clavos de olor triturados
    • 1 pizca de canela
    • 1 pizca de nuez moscada
    • 2 huevos grandes
    • 1/4 taza de aceite de girasol o olive suave (no virgen)
    • 1 yogurt natural
    • 1 pizca de sal
    • 1 taza de zanahoria rallada
    • 1 puñado de pasas
    • 1 puñado de nueces en trocitos

    Frosting

    • 1 cucharada sopera de mantequilla
    • 3 cucharadas soperas de queso crema
    • azúcar glass
    • a chorrito de esencia de vainilla

    Opté por hacerlos en versión mini por que no los quería todos con frosting con lo cual no hice una cantidad de frosting demasiado grande, lo justo para ponerlo a unos cuantos y el resto conservarlos fuera de la nevera y comerlos de desayuno en plan muffin. Pero eso dependerá de cada uno, a mi de desayuno no me apetecen con tanta historia. Así que vamos con la receta.

    En un bowl grande mezclamos la harina con el polvo de hornear y el bicarbonato.Separar las claras de las yemas y colocar las yemas en otro bowl junto con el azúcar, el yogur, la vainilla, el clavo, la canela, la nuez moscada y la sal. En otro bowl con la batidora llevamos las claras a punto de nieve y las reservamos. Ahora mezclamos lo del bowl de las yemas y el azúcar con las zanahorias, las pasas y las nueces, añadimos el aceite y mezclamos bien. Añadimos las claras batidas poco a poco. Mezclamos todo bien.
    Calentamos nuestro horno a 170ºC. Enharinamos y enmantequillamos el molde o los moldes según lo vayamos a hacer, lo podríamos hacer perfectamente en un molde largo tipo bizcocho o en pequeñitos como he hecho aquí. Añadimos la masa y al horno. Si es un molde grande aprox. unos 50 min si son pequeños tardarán como mucho 20 hay que ir revisando.

    El frosting que hice es simplemente batir el queso con la mantequilla añadirle un chorrito de vainilla y azúcar glass al gusto… los montamos y listo, un perfecto placebo de carrot cake que no deja de estar muy bueno!

    Estas fotos tan bonitas son gracias a una mini sesión hecha con NSEfotografía![/tp]

    [tp not_in=”es”]The other day someone asked if they could make my basic cake recipe with carrots, the truth is that I had not tried it, so I was not sure, therefore I decided to investigate it myself and the answer is yes! This is not a real carrot cake but it´s a pretty good substitution we could call it a fake carrot cake, and don´t get me wrong I love carrot cake but uff… A whole load of butter and tons of sugar and this girl has a quite high cholesterol as it is. So this is a healthier version to eat without remorse.
    Ingredients

    • 1 cup of pastry flour
    • 3/4 cup whole wheat flour
    • 2 Teaspoons baking powder
    • 1 teaspoon of baking soda
    • 1 cup sugar cane
    • 1 splash of vanilla extract
    • 2 crushed cloves
    • 1 pinch of cinnamon
    • 1 pinch of nutmeg
    • 2 large eggs
    • 1/4 cup sunflower oil (or low flavored olive oil)
    • 1 natural flavored yogurt
    • 1 pinch of salt
    • 1 cup of grated carrots
    • 1 handful of raisins
    • 1 handful of chopped walnuts

    Frosting

    • 1 tablespoon softened butter
    • 3 tablespoons cream cheese ( I used low fat)
    • Icing sugar (to taste)
    • a dash of vanilla essence

    I decided to make them in mini versions because I did n´t want to have them all with frosting which is why I did n´t make a very large amount of it, just enough to put on a few and keep the rest of them out of the fridge and have them as breakfast in a sort of muffin way. But that depends on our preferences, for me as breakfast buns they work ok without frosting. So here we go with the recipe.

    In a large bowl mix the flour with the baking powder and the baking soda.Separate the whites from the yolks and place yolks in another bowl along with the sugar, yoghurt, vanilla, cloves, cinnamon, nutmeg and salt. In another bowl (with our mixer) we mix whites until stiff and save them for later. Now we mix the bowl with the yolks and sugar with the carrots, raisins and walnuts we add the oil and mix it up well. Add the egg whites gradually and mix well until smooth.

    We heat our oven to 338 ºf. Butter and flour your chosen molds. We could do it in a loaf cake mold or in tiny molds as I did here. Add the dough and get them in the oven. If the mold is large, it will take approx. about 50 min, if you use the small ones they will take tops 20 min but check them from time to time.

    For the frosting I just beat the cheese and butter and added a dash of vanilla and powdered sugar to taste. Assemble them and they are ready, a quite good placebo carrot cake!
    These beautiful pictures are the result of a mini session made with NSEfotografía![/tp]
    carrot_cake_13366_Mariano_Regidor-1carrot_cake_13374_Mariano_Regidor

    Categories
    Muy fácil Vegetarianos

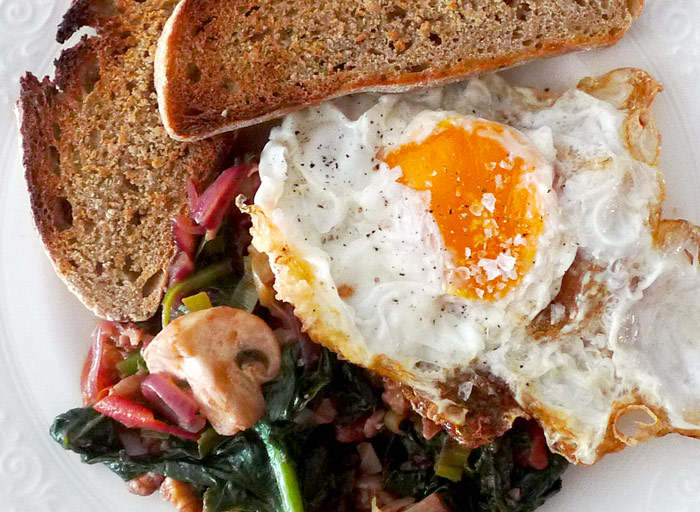
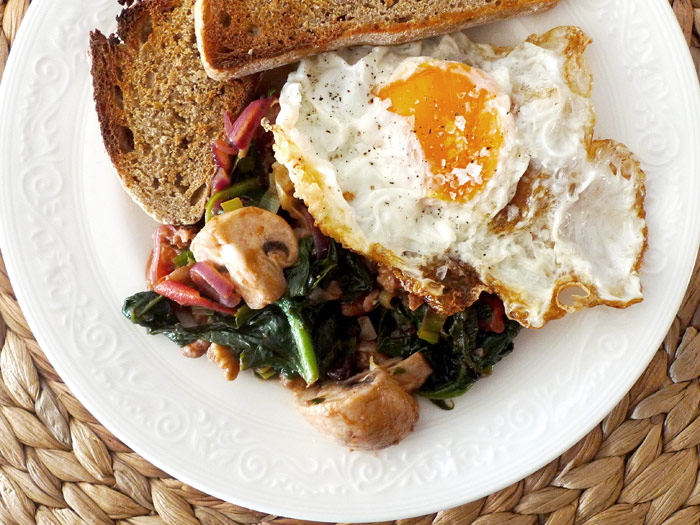
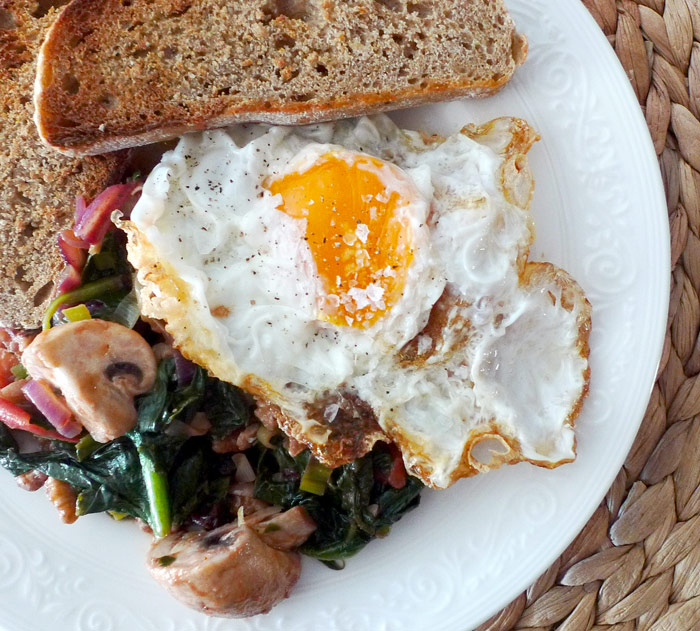
    Hoy simplicidad: espinacas salteadas con huevo frito

    P1070382P1070379
    [tp lang=”es” only=”y”] Ayer tocó chuletas. Que ricas… pero hoy vamos con algo sin carne, sencillo que se hace en 10 minutos y resuelve cualquier cena. Unas espinacas salteadas con huevo frito, con un poquito de gracia eso sí. Realmente lo más complicado aquí es hacer bien el huevo frito que siempre es motivo de discrepancias caseras, a mi me gustan de una forma a mi chico de otra, suele pasar…  pero vamos con la mini receta.[/tp]

    [tp lang=”es” only=”y”]Ingredientes

    • Manojo de espinacas
    • Champiñones cortados en 4
    • 1 cebolla morada en rodajas
    • 2 dientes de ajo picados
    • un puñado de nueces
    • un puñado de pasas
    • un puerro picado en rodajas
    • Aceite de oliva
    • 1 o 2 huevos

    Calentamos un pelin de aceite en una sartén grande o wok. Primero sofreímos el ajo, las cebollas y el puerro. Cuando empiecen a dorar añadimos los champiñones, las espinacas, las pasas y las nueces, un para de vueltas a fuego alto y fuera… fácil no, lo siguiente.

    Luego llega el huevo frito… como más nos guste. En mi caso, el aceite a fuego medio-alto. Separar la yema de la clara. Colocar la clara en un bowl y echarla primero en el aceite para que cuaje. Cuando vemos que ya empieza a cuajar (a ponerse blanquita) Colocamos con cuidado la yema en el centro unos minutitos para que se espese un pelin pero que no llegue a cocerse del todo y fuera… un par de rebanadas de pan y lo tenemos hecho![/tp]

    [tp not_in=”es”]Yesterday we got pork chops. Ñom… but today we have something meatless, easy and done only in 10 minutes! It solves any dinner. Sauteed spinach with a fried egg, with a little touch of course. Actually the hardest part here is to make a good fried egg. At home this is always cause for discrepancies, I like them in one way while my guy prefers them otherwise… but, lets get this recipe done.

    Ingredients

    • Bunch of spinach
    • Mushrooms cut into 4 pieces
    • 1 sliced ​​red onion
    • 2 cloves garlic, minced
    • a handful of walnuts
    • a handful of raisins
    • one chopped leek sliced
    • Olive oil
    • 1 or 2 eggs

    We heat a tad of oil in a large skillet or wok. First we fry the garlic, onions and leeks. When they start to brown add the mushrooms, spinach, raisins and walnuts, we give them a pair of turns at high heat and leave them to rest.

    Then the fried eggs… this is how I like them. Oil over medium-high heat. Separate the yolk from the white. Place the whites in a clear bowl and pour them in the oil first so that they sets. When you watch it´s beginning to jell carefully put the yolk in the center for a few minutes only to thicken a bit but taking care that it will not get all cooked and they will remain runny. We serve the spinach with a couple of slices of bread and the egg on top and we are done![/tp]

    P1070381

    Categories
    Carnívoros Imprescindibles Intermedio, un poco más de trabajo

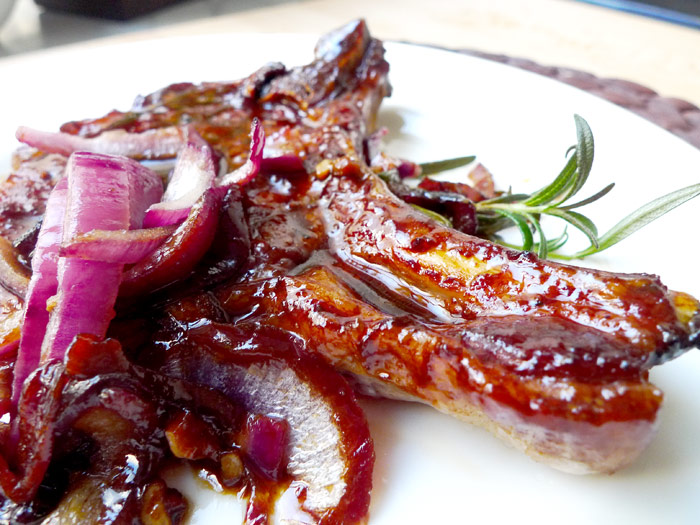
    Chuletas de cerdo marinadas

    P1070408P1070414

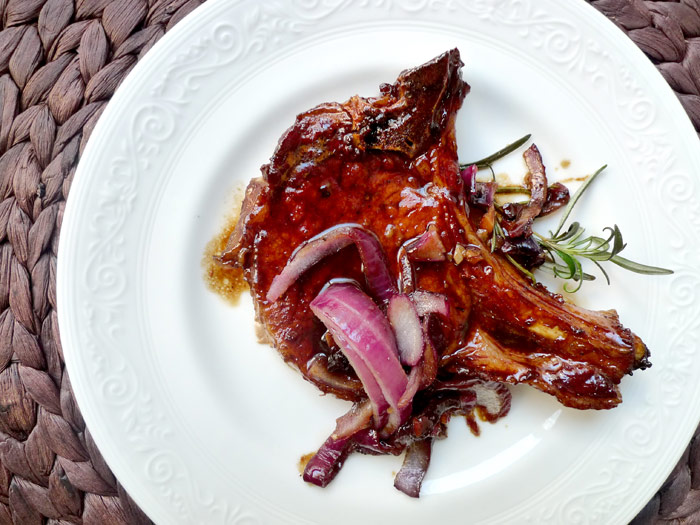
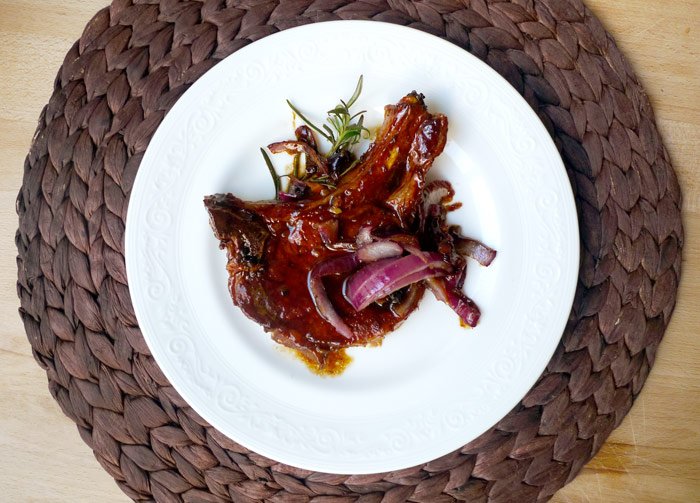
    Hoy tocan chuletas de cerdo. Baratas, ricas y facilitas… cómo nos gustan. Ayer las cenamos con puré de batata he aquí la receta pero vamos con las chuletas.

    Ingredientes

    • 4 chuletas de cerdo
    • 2 dientes de ajo
    • 1 cebolla morada
    • una ramita de romero
    • 1 taza de salsa de soja
    • 1 limón
    • 2 cucharadas soperas de miel
    • sal
    • pimienta
    • comino
    • 2 clavos de olor
    • aceite de oliva

    P1070414

    Preparamos en un bowl el marinado. La salsa de soja, el zumo de limón, la miel, una pizca de comino, sal, los clavos y la pimienta. En una fuente tipo de horno colocamos las chuletas y les echamos el menjunje, añadimos las hojitas de romero y le damos bien con un pincel por todos lados, es importante esparcir bien el menjunje en las chuletas para que caramelicen correctamente. Las dejamos así una hora. Mientras picamos el ajo en trocitos y la cebolla en rodajas. Cuando estemos listos, calentamos el aceite a fuego alto. Sofreímos el ajo y la cebolla y colocamos las chuletas en la sartén, escurriendo lo mejor posible el liquido que lo dejamos en la fuente. En este punto, retiramos los clavos del menjunje.

    Marcamos bien las chuletas para que estén doradas por ambas caras. Luego bajamos el fuego y añadimos el liquido de la fuente, dejamos que se terminen de cocer a fuego bajito hasta que estén bien hechas pero fijaos que no se sequen, ni se os queme la salsa… un poco de puré al lado o lo que queráis y listo!


    P1070407

    Categories
    Desayunos Dulces Fácil Masas y Pan

    Somos bizcocheros y a mucha honra… Bizcocho de mandarina y limón

    P1070315

    P1070326
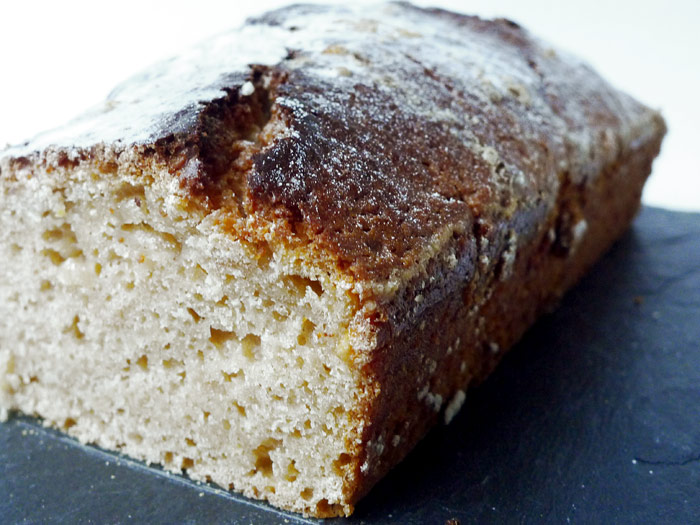
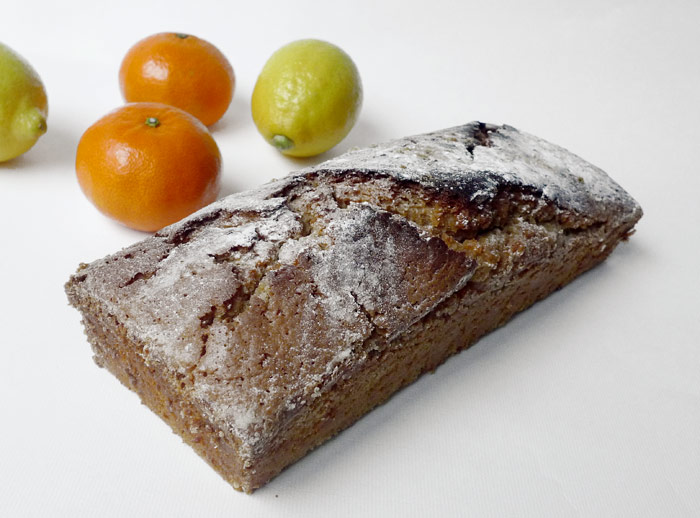
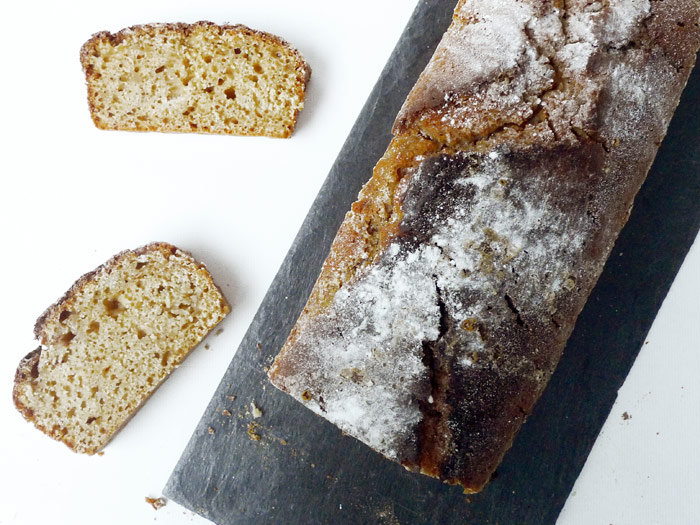
    [tp lang=”es” only=”y”] Como nos gustan los bizcochos… En casa somos muy de bizcocho. Yo los amo y mi chico más, así que suelo tener petición de bizcocho casi todos los fines de semana. No pongo receta por que es la misma que en este post Una historia de amor… Con una pequeña variación, esta vez no lleva semillas de amapola y lleva ralladura de limón y mandarina, un poquito de azúcar en polvo por encima y voilà! Es que con una buena receta base se pueden hacer tantas variaciones e inventos![/tp]

    [tp not_in=”es”]We love cakes… At home we are a couple of cake lovers. I love them and my boy more than me so I usually have cake request every weekend. I am not putting a recipe because it is the same as in this post A love story… With a small change, this time it does not have poppy seeds and instead it has lemon and tangerine zest, a little powdered sugar on top and voilà! With a good basic recipe you can make soooo many variations and inventions![/tp]

    P1070328

    Categories
    Muy fácil Sandwiches

    Sanguchon para la cena: huevo, apio y aceitunas con secreto.

    P1070373

    P1070378
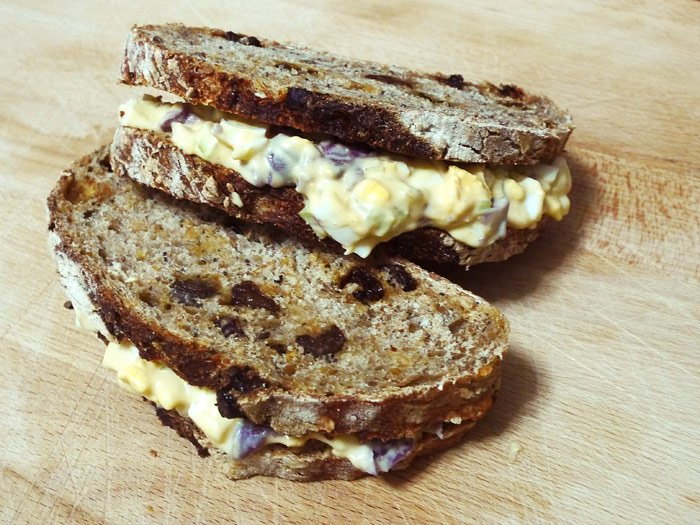
    [tp lang=”es” only=”y”]Una cena rápida y memorable, sanguchon absoluto. Esto es una variación del clásico sandwich de huevo cocido con mayonesa (uno de mis favoritos), he aquí la versión con un toque de peruvian love.[/tp]

    [tp lang=”es” only=”y”]Ingredientes
    Para dos con hambre…

    • 4 huevos cocidos
    • Mayonesa
    • Aceitunas negras (yo he usado aceitunas de botija peruanas pero se puede modificar por las que tengamos a mano)
    • 2 ramitas de apio
    • Salsa de ají

    P1070369
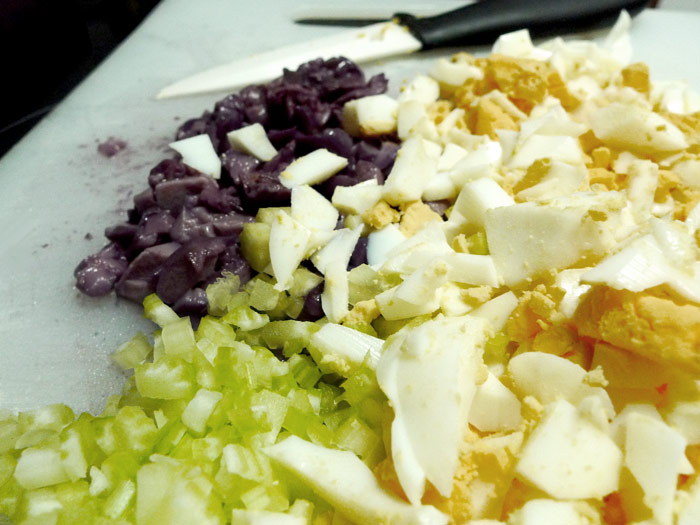
    Poner todo muy bien picado, especialmente el apio (muy pequeñito) en un bowl, añadir un par de cucharadas de mayonesa y una pizca de ají amarillo… mezclar bien y hala, al pan. Los hice en mi pan de pasas…de muerte. Salen 4 contundentes![/tp]

    [tp not_in=”es”] A quick and memorable dinner, absolute sandwich. This is a variation of the classic boiled egg sandwich with mayonnaise (one of my favorites), here is the version with a touch of peruvian love.
    Ingredients
    For two hungry people…

    • 4 hard-boiled eggs
    • Mayonnaise
    • Black olives
    • 2 twigs of celery
    • Ají amarillo (yellow pepper sauce or use chilly)

    Chopp all very fine, especially the celery (very small) in a bowl, add a couple of tablespoons of mayonnaise and a pinch of yellow pepper sauce… mix well. I made them in my raisins bread… really good. Enough for 4 big ones![/tp]

    Categories
    Masas y Pan

    Pan de anarquía con pasas y semillas y dos amigos integrales

    P1070334P1070332
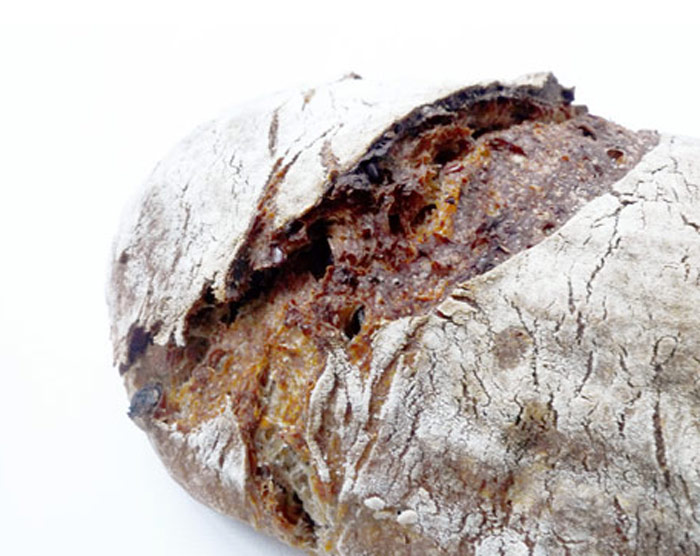
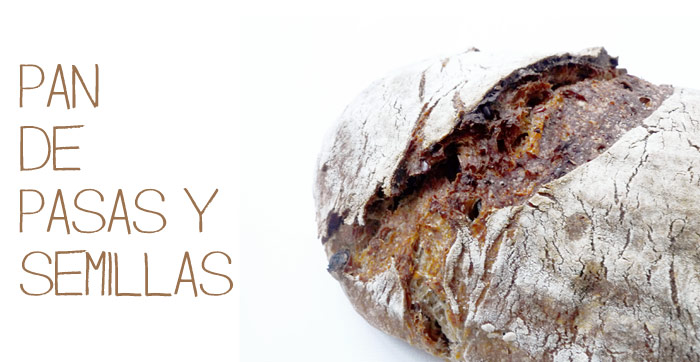
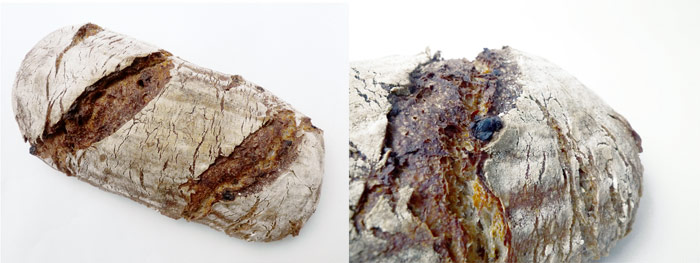
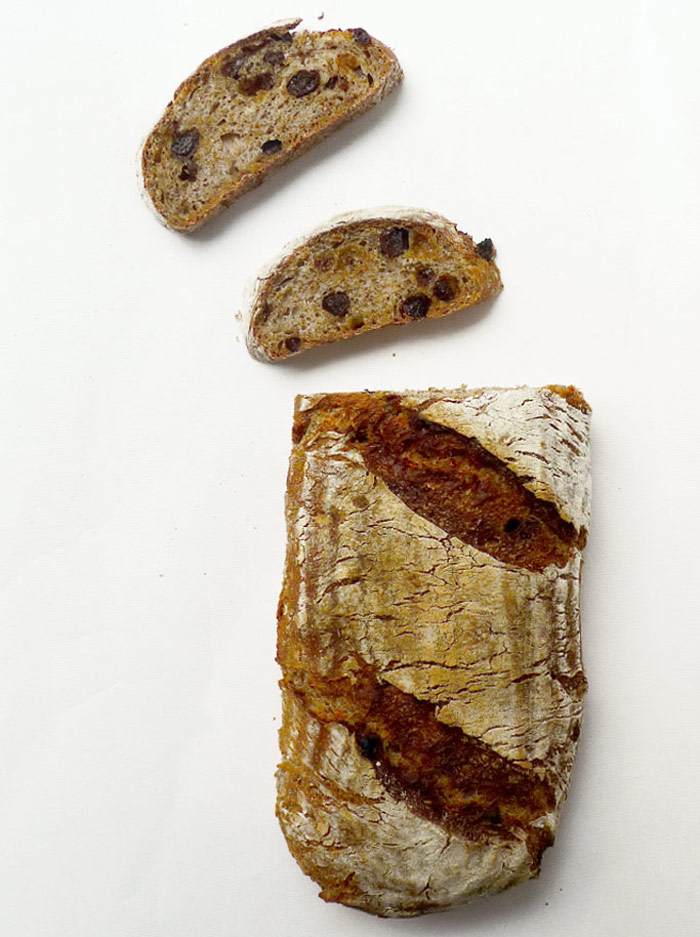
    [tp lang=”es” only=”y”] Un pan de pasas. Uno de los panes más bonitos que he hecho hasta ahora y un pan completamente anárquico. Esto es de esas cosas que pasan a veces, en las que digo… al diablo con la receta y va y sale bien. Masa madre de centeno, trigo blanco y trigo integral, mezclado en base a como me pareció que estaba bien, sin receta, sin pesar y sin nada, a ojo. Pasas, semillas de lino y de amapola. Rico, bonito y con unos colores… eso sí, tengo que aprender a apuntar, pero aun así… muy contenta. Me gustan mis experimentos, viva la anarquía![/tp]

    [tp not_in=”es”] A raisins bread. One of the prettiest loaves I’ve done so far and a completely anarchic bread. This is one of those things that happen sometimes, When I say… to hell with the recipe and turns out well. Rye sourdough, white wheat and whole wheat, mixed by intuition, without weighting, without regrets and without any recipe. Raisins, linseed and poppy. Rich, Nice colors… yes, I have to learn to write down this things, but still… very happy. I like my experiments, long live anarchy! [/tp]

    P1070343

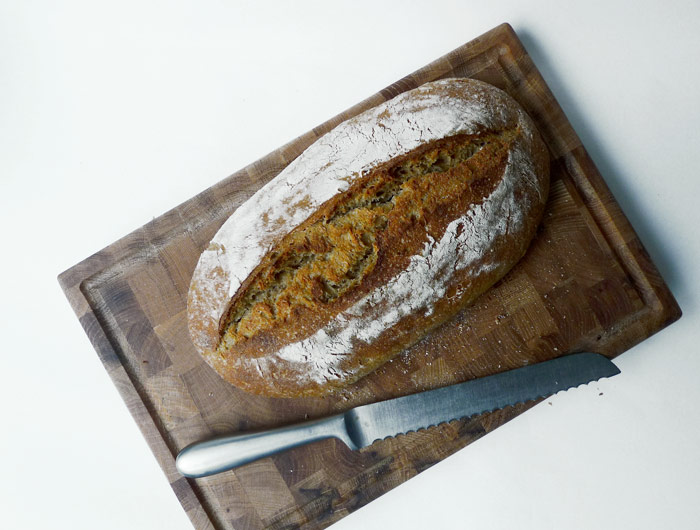
    [tp lang=”es” only=”y”] Aparte un par de integrales, receta del libro de Tartine, con un ligero cambio de harinas. Bastante contenta con esas greñas.Ha sido un buen finde panaderil. [/tp]

    [tp not_in=”es”] Besides a pair of whole wheat breads, from the Tartine recipe book, with a slight change of flour. Pretty happy with these scores.It has been a good bread weekend.[/tp]

    P1070354P1070356P1070352

    Categories
    Carnívoros Intermedio, un poco más de trabajo

    Viva México y su cochinita pibil

    _DSF8040

    _DSF8037

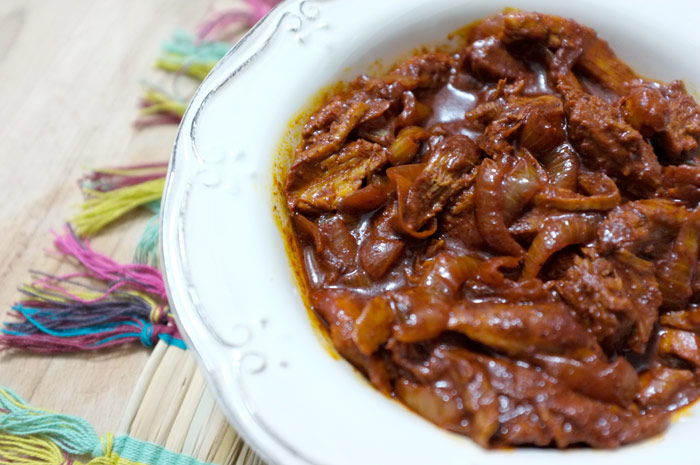
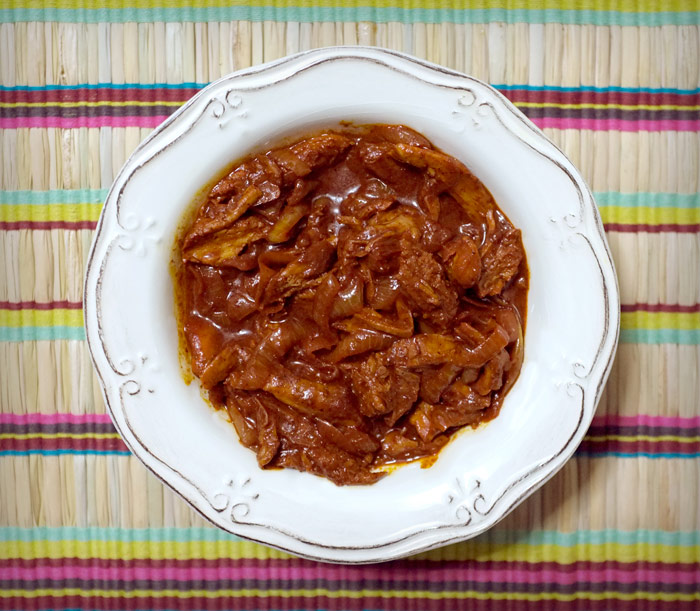
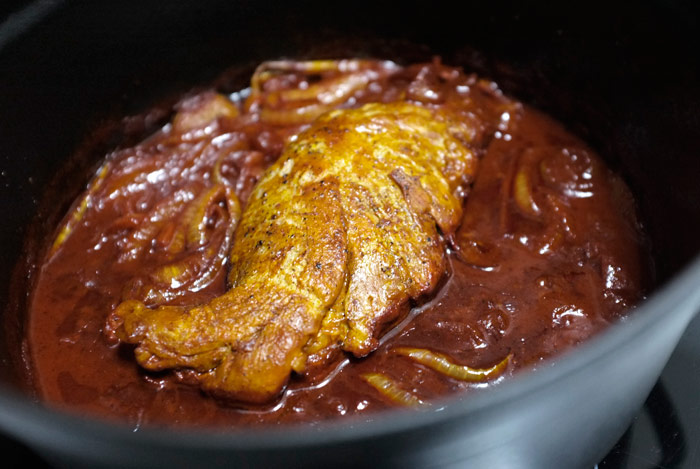
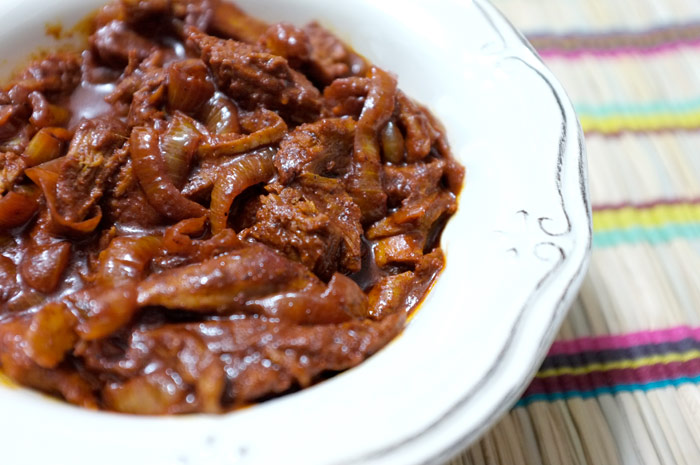
    [tp lang=”es” only=”y”] La cochinita pibil es mi plato favorito de la cocina mexicana. Me encanta y voy buscando la mejor cochinita siempre que voy a un mexicano y como no tengan… adiós. Es un plato típico de la cocina yucateca.  La palabra pibil viene del maya pib que significa enterrado, ya que el método de cocción tradicional es enterrado en la tierra en un hueco con piedras y carbón (igual que  la pachamanca peruana) y de igual manera en México también usan las hojas del plátano para envolver los alimentos al meterlos en el agujero a cocer. Como obviamente no tenemos ni agujero, ni carbón ni hojas de plátano vamos a hacer una versión adaptada, en este caso a lo me kitchen. Estuve viendo recetas y opté por seguir una  del blog gastronomía y cía que a su vez sigue una  de Ferrán Adrià, aunque le hice mis pequeños cambios como siempre. Aquí va mi versión…

    Ingredientes

    • 1 solomillo de cerdo
    • 2 cebollas blancas
    • zumo de 1 limón
    • zumo de 3 naranjas (de zumo)
    • 100grs. de achiote
    • orégano
    • comino
    • vinagre balsámico
    • aceite de oliva
    • pimienta negra
    • sal
    • ron
    • azúcar de caña
    • vino blanco
    • 2 dientes de ajo

    Vamos por pasos… [/tp]

    [tp not_in=”es”]Cochinita pibil is my favorite Mexican dish. I love it and I’m always looking for the best cochinita whenever I go to a Mexican. It is typical from the Yucatan cuisine. The word pibil comes from Mayan word Pib which means buried, as the traditional cooking method for this dish is to cook it buried in the ground in a hole with stones and coal (Like the Peruvian Pachamanca) and likewise in Mexico they also use banana leaves to wrap the food before tossing it into the hole to cook. As obviously we have no hole, no coal or banana leaves here in my Madrid apartment, I will make a customized version, in this case me kitchen style. I was looking at recipes and chose to follow the one from the blog gastronomy and Co. which in turn used one from Ferran Adrià, although I did my small changes as usual. Here’s my version …

    Ingredients

    • 1 pork tenderloin
    • 2 white onions
    • juice 1 lemon
    • juice 3 oranges (juice)
    • 100grs. de achiote
    • oregano
    • cumin
    • balsamic vinegar
    • olive oil
    • black pepper
    • to
    • ron
    • cane sugar
    • white wine
    • 2 cloves of garlic

    Let´s go step by step… [/tp]

    P1070360

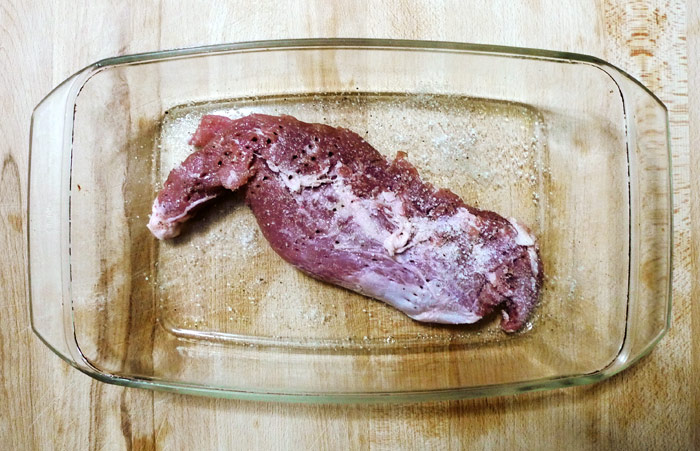
    [tp lang=”es” only=”y”] Primero, el solomillo.
    Ponerlo en una fuente o un plato, untarlo con aceite de oliva y embadurnarlo con sal y pimienta. Pincharlo con el tenedor varias veces por todos lados para dejar agujeritos por dónde se va a meter la salsa y dejarlo reposar así.

    Segundo, la salsa.
    En el vaso de la licuadora echamos el achiote, el zumo de naranja, el orégano (1 pizca), el comino, un chorrito de vinagre balsámico, 1 chorrito de aceite de oliva, sal, pimienta, los dos dientes de ajo pelados,  1 chorrito de vino blanco y 2 cucharaditas de azúcar de caña. Licuamos bien y reservamos. [/tp]

    [tp not_in=”es”]First, tenderloin.
    Put it in a bowl or dish, smear it with olive oil and smear it with salt and pepper. Prick with a fork several times to leave holes everywhere (so the sauce will get deep inside) and let it sit.
    Second, Sauce.
    In a blender pour the achiote, orange juice, oregano (1 pinch), cumin, a dash of balsamic vinegar, 1 dash of olive oil, salt, pepper, two cloves of garlic peeled, 1 splash of white wine and 2 teaspoons of sugar cane. liquefy well and reserve.[/tp]

    P1070363

    [tp lang=”es” only=”y”] Tercero, las cebollas.
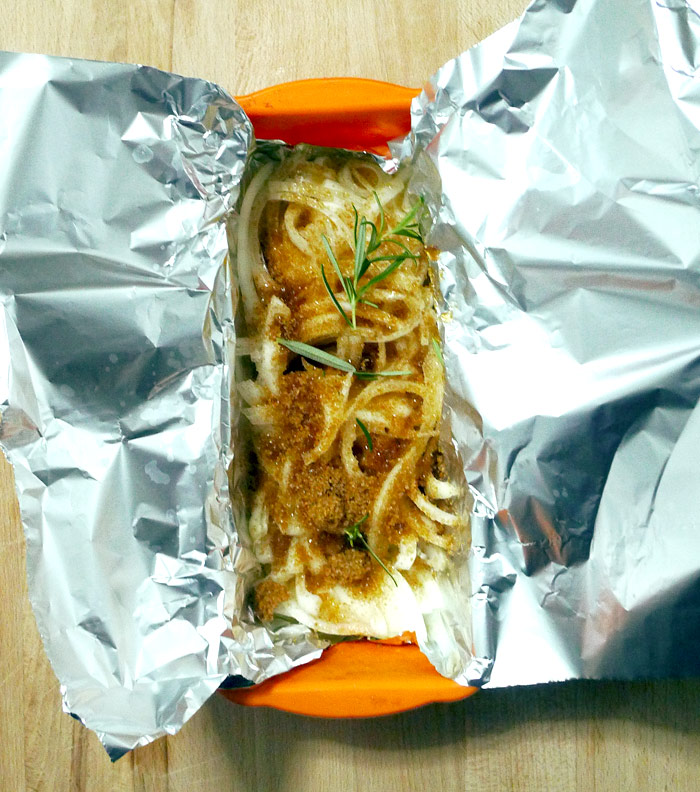
    Esto se come con unas cebollas moradas maceradas en zumo de lima y chile picado, parecido a la salsa criolla. Pero no tenía cebolla morada por un lado y me gusta mucho la cochinita con la cebolla confitada por el otro, así que hice otra versión. Una cebolla confitada en ron y limón. Picamos una de las dos cebollas en juliana muy finitas. Cogemos un recipiente para horno que previamente forramos con papel albal (dejad  papel sobrante por que luego lo taparemos) En esta especie de cuna de papel albal colocamos la cebolla, un chorrito de ron blanco, el zumo del limón y 1 cucharada sopera de azúcar de caña. Tapamos con el papel albal  haciendo un papillote y lo metemos al horno,unos 30 minutos para que la cebolla este confitada y blandita. [/tp]

    [tp not_in=”es”]Third, onions.
    This is eaten with some red onions marinated in lime juice and chopped chili , like the salsa criolla. But I had no red onions and I really like the cochinita with caramelized onions so I made another version. Rum caramelized onions with lemon. Chop one of the two onions very thinly. Take a casserole dish previously covered with foil (let excess paper on the sides so that it will be able to cover) In this sort of foil cradle put oniosn, a splash of white rum, lemon juice and 1 tablespoon of sugar cane. Cover with foil doing a papillote and put in the oven about 30 minutes until onions are caramelized and squishy.[/tp]

    _DSF8024

    [tp lang=”es” only=”y”] Cuarto, volvemos al solomillo
    En la receta de Gastronomía y cía lo hacen en un papillote (en una fuente tapado con papel albal) Yo lo hice en mi cocote.  Así que si no tenéis cocote en fuente normal con papel por encima y ya…  Coger la cocote o la fuente y embadurnar con un pincel de aceite de oliva. Colocamos el solomillo en el centro.  Colocamos la otra cebolla a los lados picada en juliana (más gorda que la anterior). Echamos la salsa por encima y mezclamos bien y al horno, unos 200ºC por aprox. 50-60 minutos.

    Los últimos 10 minutos la destapé para dorar un poquito la carne. Sacar y servir con la salsa de cebollas que también teníamos en el horno y unas tortillas de maíz en su mejor caso o de trigo como en mi caso que me faltaron unas buenas tortillas!

    *Dato: La receta ha sido probada y aprobada por mi compi mexicana! Aunque me dice que la versión real es más agria y ácida y yo he tirado más al dulce.  Si la queremos menos dulce, quitar las dos cucharaditas de azúcar de la salsa y en lugar de cebolla confitada macerar la cebolla en el zumo de lima con chile habanero picado![/tp]

    [tp not_in=”es”] Fourth, back to the meat
    In the recipe I followed they did it in a papillote (a tray covered with foil) I did it in my cocotte (dutch oven). So if you don´t own a cocotte a regular tray and foil will do it … Take the cocotte or tray and spread with a brush of olive oil. Place the tenderloin in the center. Put on the sides the chopped onion. Pour the sauce over, mix well and bake at 392 ° F for approx. 50-60 minutes.
    The last 10 minutes take the lid off so that the meat browns a little. Remove and serve with the sauce, the caramelized onions and some tortillas.

    *Tip: The recipe has been tested and approved by my Mexican workmate! Although she tells me that the real version is more sour and acidic and I have made it a bit more sweet. If you want it less sweet, Remove the two teaspoons of sugar from the sauce and the caramelized onions and instead marinate the onions in lime juice with chopped habanero chile![/tp]

    _DSF8032

    _DSF8042

    Categories
    Del Mar Muy fácil

    Clamchowderrrrr

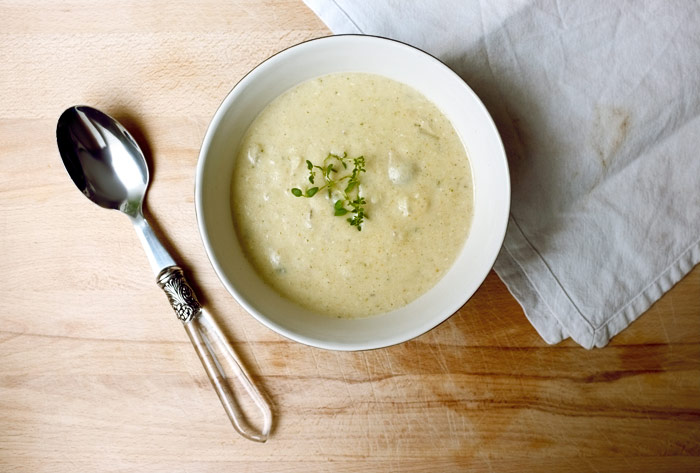
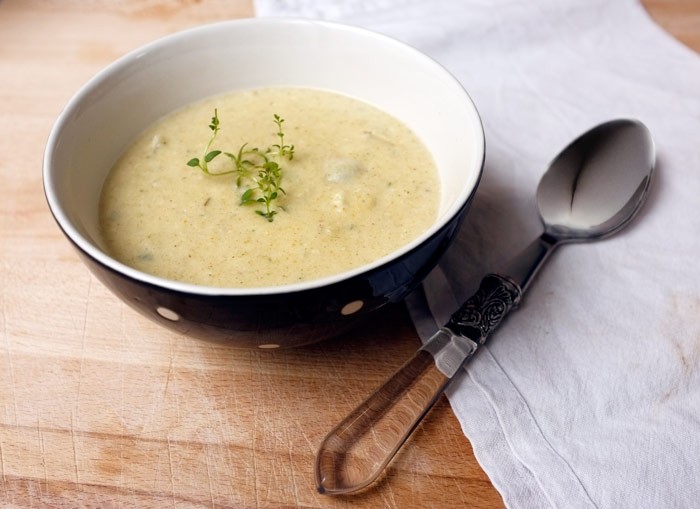
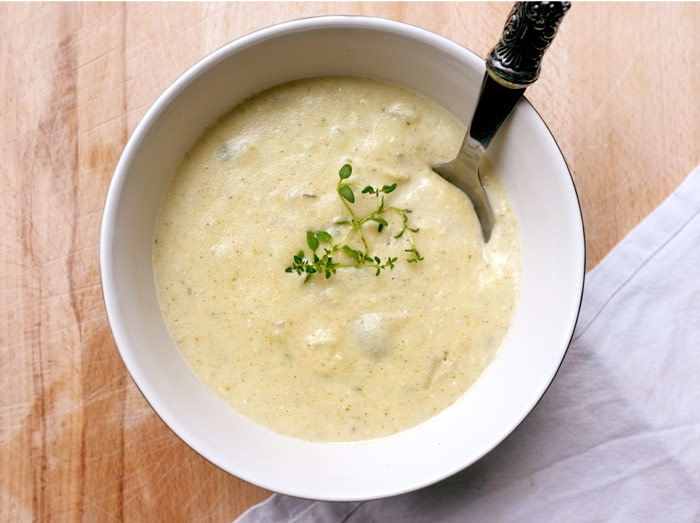
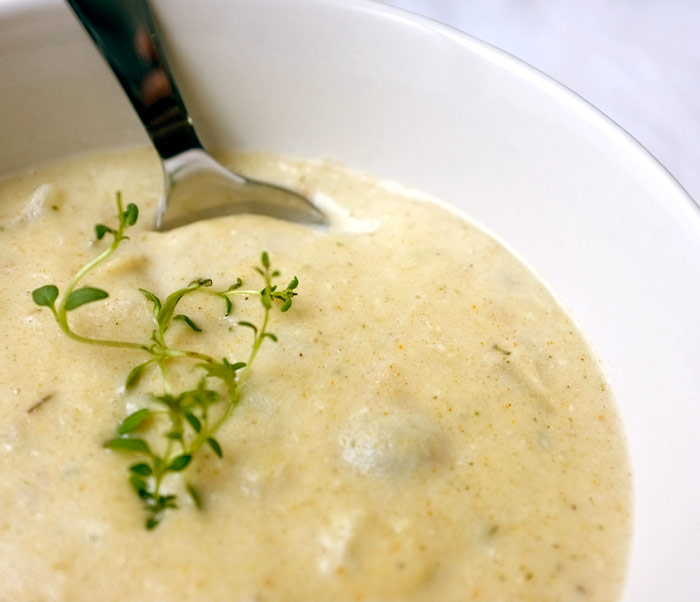
    _DSF8009[tp lang=”es” only=”y”]Hoy toca Clamchowder mmm…. ¿y que es eso? pues una sopa cremosa de almejas ni más ni menos. Chowder de denomina a las sopas cremosas o espesadas.  Se suele servir los viernes como alternativa a la carne, algo que viene de la cuaresma, pero que se ha instaurado  durante todo el año y no me extraña por que está buenísima.  El clam chowder, en su versión inglesa a base de nata, se ha elaborado desde mediados del siglo XIX, y en America desde los años 1930. En muchos lugares se sirve dentro de un bowl de pan…todo un lujo![/tp]
    [tp lang=”es” only=”y”]Es muy fácil de hacer, aquí va…[/tp]

    [tp not_in=”es”]Today we have Clamchowder mmm…. And what is that? a creamy clam soup of course. Chowder is the name given to cream or thickened soups. It is usually served on Fridays as an alternative to meat, something that comes from Catholic Lent, but now it has been established throughout the whole year and it´s understandable, it´s lovely! The clam chowder, in it´s English version has been around since the mid-nineteenth century and in America since the 1930´s. It is served in many places in a bread bowl… now that´s a luxury!
    It is quite easy to do, here we go…[/tp]

    _DSF8012

    [tp lang=”es” only=”y”]Ingredientes

    • 2 latas de almejas al natural
    • mantequilla
    • 3 dientes de ajo
    • 1 cebolla blanca
    • 1 vaso de vino blanco
    • 1 taza de caldo de pollo
    • tomillo
    • sal
    •  pimienta
    • 2 patatas peladas
    • leche

    [/tp]

    [tp lang=”es” only=”y”]Lo primero vamos a picar la cebolla y el ajo muy finitos y cortamos la patata en trocitos.  Ponemos en la cacerola un poquito de mantequilla y sofreímos el ajo y la cebolla.  Añadimos las almejas con el caldo de la lata y todo. Añadimos las patatas, el vino, la taza de caldo, sal y pimienta y dejamos a fuego medio-bajo que se hagan las patatas. Cuando esten listas con la ayuda de un colador sacamos aprox. la mitad de almejas, cebolla y patatas. El resto lo licuamos. Si queda muy espesa añadir un poco de leche hasta que tenga la textura de crema que nos gusta. Le volvemos a añadir los trozos que hemos sacado al colador, para que tenga algunos trozos en la sopa, si no nos gustan los trozos pues lo licuamos todo y ya.  Ponemos unas ramitas de tomillo por encima y lista!Esta de muerte  con un pan tostado al lado… [/tp]

    [tp not_in=”es”]Ingredients

    • 2 cans of natural (in water) clams
    • butter
    • 3 cloves of garlic
    • 1 white onion
    • 1 glass of white wine
    • 1 cup of chicken broth
    • thyme
    • salt
    • pepper
    • 2 peeled potatoes
    • milk

    To begin chop the onions and the garlic very small pieces and cut the potatoes (peeled) in four. Put in a casserole a little butter and fry the garlic and onion. Add the clams with all the broth from the can. Add the potatoes, the wine, a cup of broth, salt, pepper and leave on medium-low heat until the potatoes are done. When they are ready with the help of a strainer get out of the pan approx. half the clams, onions and potatoes. Liquefy the rest. If it´s too thick add a little milk until it has the creamy texture you like. Add back the pieces that we previously took off on the strainer, to have some chunks in it. If you don´t like chunks just liquefy everything. Put a few sprigs of thyme over and you are ready!
    Have with a good toasted bread on the side…[/tp]

    _DSF8013